

Overview
A Stripe restricted key lets 9Pic Checkout use only the Stripe permissions it needs instead of a full-access secret key. Create the key in Stripe first, then paste it into Payment Config -> Add Gateway -> Stripe in 9Pic. Use the downloadable Stripe Restricted API Key Setup Guide as your external checklist while following this dashboard guide.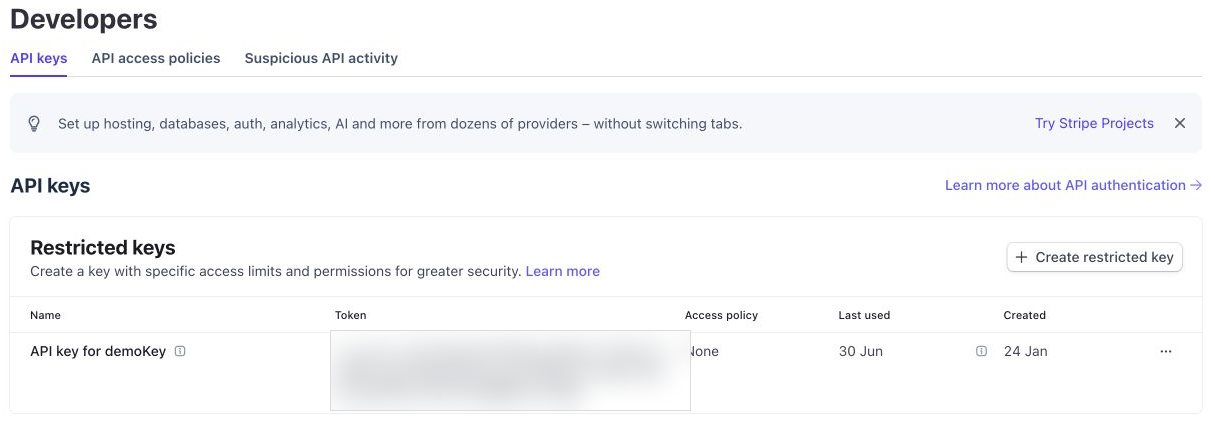
Stripe API keys page
Before You Start
Make sure you have:Create the Restricted Key in Stripe
1
Open API keys
Sign in to Stripe and open Developers -> API keys. In the Restricted keys section, click Create restricted key.
2
Choose the purpose
When Stripe asks how you will use the key, select Powering an integration you built, then click Continue.
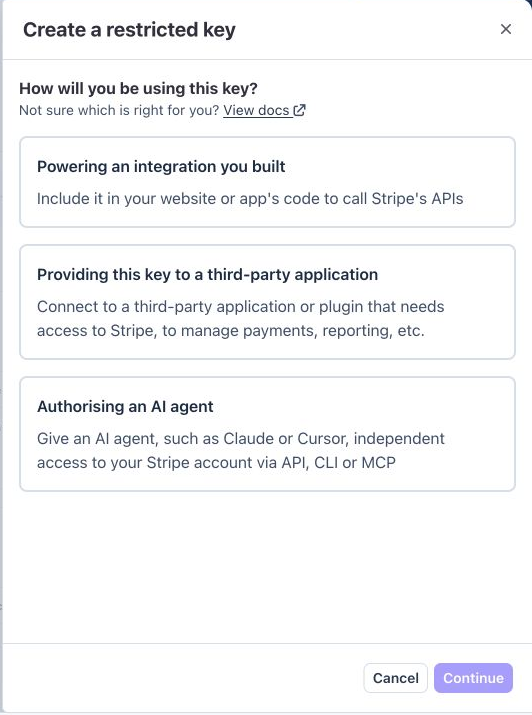
Choose how the restricted key will be used
1
Choose your own permissions
Select Choose your own so you can grant only the permissions 9Pic Checkout needs.
2
Name the key
Use a clear name such as
9Pic Checkout Restricted Key. If you maintain separate test and live keys, include that in the name.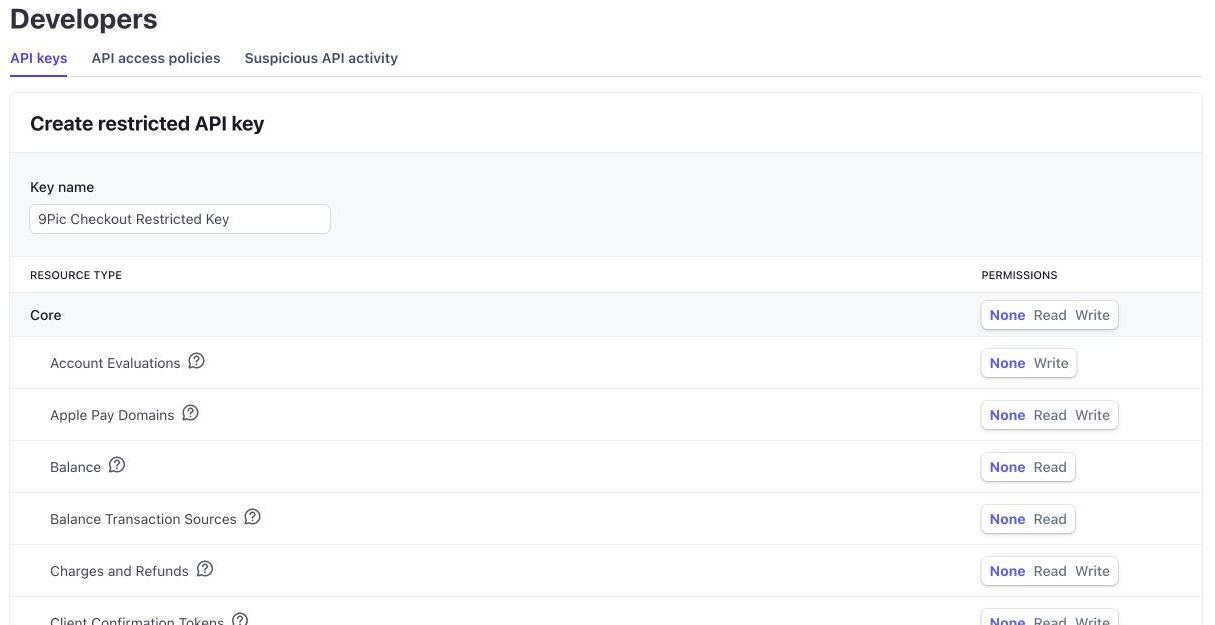
Restricted key name and permission table
Required Stripe Permissions
Set only the rows 9Pic needs, and leave unrelated resources on None.Stripe may rename or combine rows over time. For example, some accounts show Charges and Refunds as one row. If Stripe shows a permission-denied message later, edit the restricted key, add the missing resource permission, save, and test again.
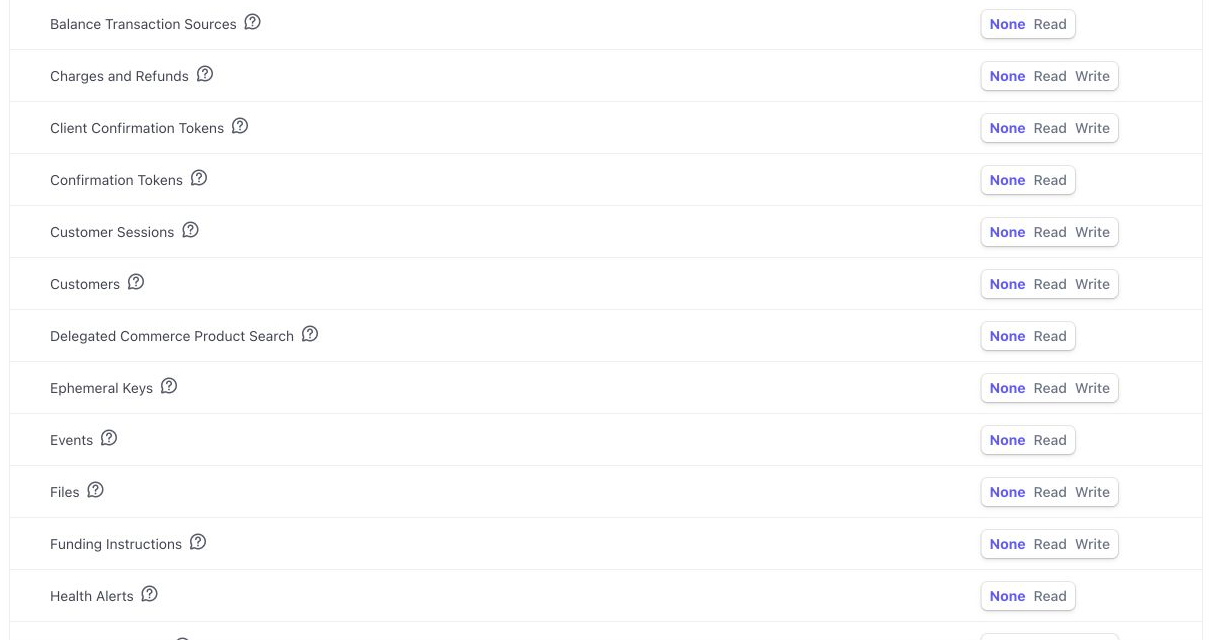
Core permissions in Stripe
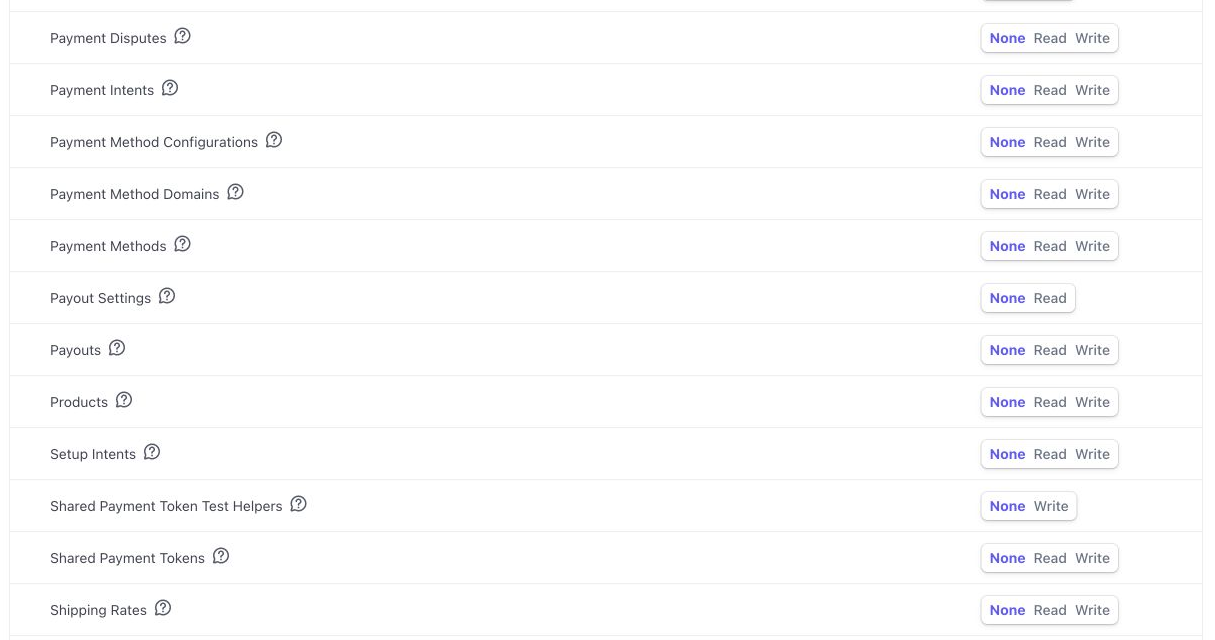
Payment permissions in Stripe
Save the Key Safely
1
Review before creating
Confirm the key name, Stripe account, test/live mode, and permissions before you click Create key.
2
Create and copy once
Click Create key. Stripe shows the restricted key value only once. Copy it immediately and store it securely.
3
Do not share it casually
Do not paste the key into email, chat, screenshots, task tickets, public documents, or browser-side code.
Add the Key to 9Pic
1
Open Payment Config
In 9Pic, open Payment Config from the dashboard sidebar.
2
Add a Stripe gateway
Click Add Gateway, choose Stripe, and paste the restricted key into the Stripe Secret Key field. The field stores the protected Stripe credential for your organisation, even when the key starts with
rk_test_ or rk_live_.3
Create the gateway
Click Create Gateway. The gateway list should show the Stripe configuration as Configured.
4
Map events to Stripe
In Event Mapping, assign the Stripe gateway to each event that should use Stripe for 9Pic Checkout.
Verify the Setup
Before using Stripe for a live event:Troubleshooting
Stripe says the key does not have permission.
Stripe says the key does not have permission.
Open the restricted key in Stripe, find the resource named in the error message, set the needed permission, save, and retry the test payment or invoice step.
I copied the key but lost it before adding it to 9Pic.
I copied the key but lost it before adding it to 9Pic.
Create a new restricted key, store it securely, add the new value to 9Pic, then revoke the unused key in Stripe.
Should I use the same key for test and live payments?
Should I use the same key for test and live payments?
No. Keep separate keys for test mode and live mode. This reduces mistakes and makes rotation easier.
The 9Pic field says Stripe Secret Key. Can I paste a restricted key?
The 9Pic field says Stripe Secret Key. Can I paste a restricted key?
Yes. Paste the restricted key value there. Stripe restricted keys start with
rk_test_ in test mode and rk_live_ in live mode.Next Steps
Payment Config
Create and manage organisation-level gateway configurations.
Checkout Setup
Assign a gateway to an event, publish plans, and enable Checkout.