Overview
The Photos Overview tab is the control center for your event’s photo lifecycle. You will connect image sources, generate watermark previews, run AI processing, and publish the event so participants can search and download photos.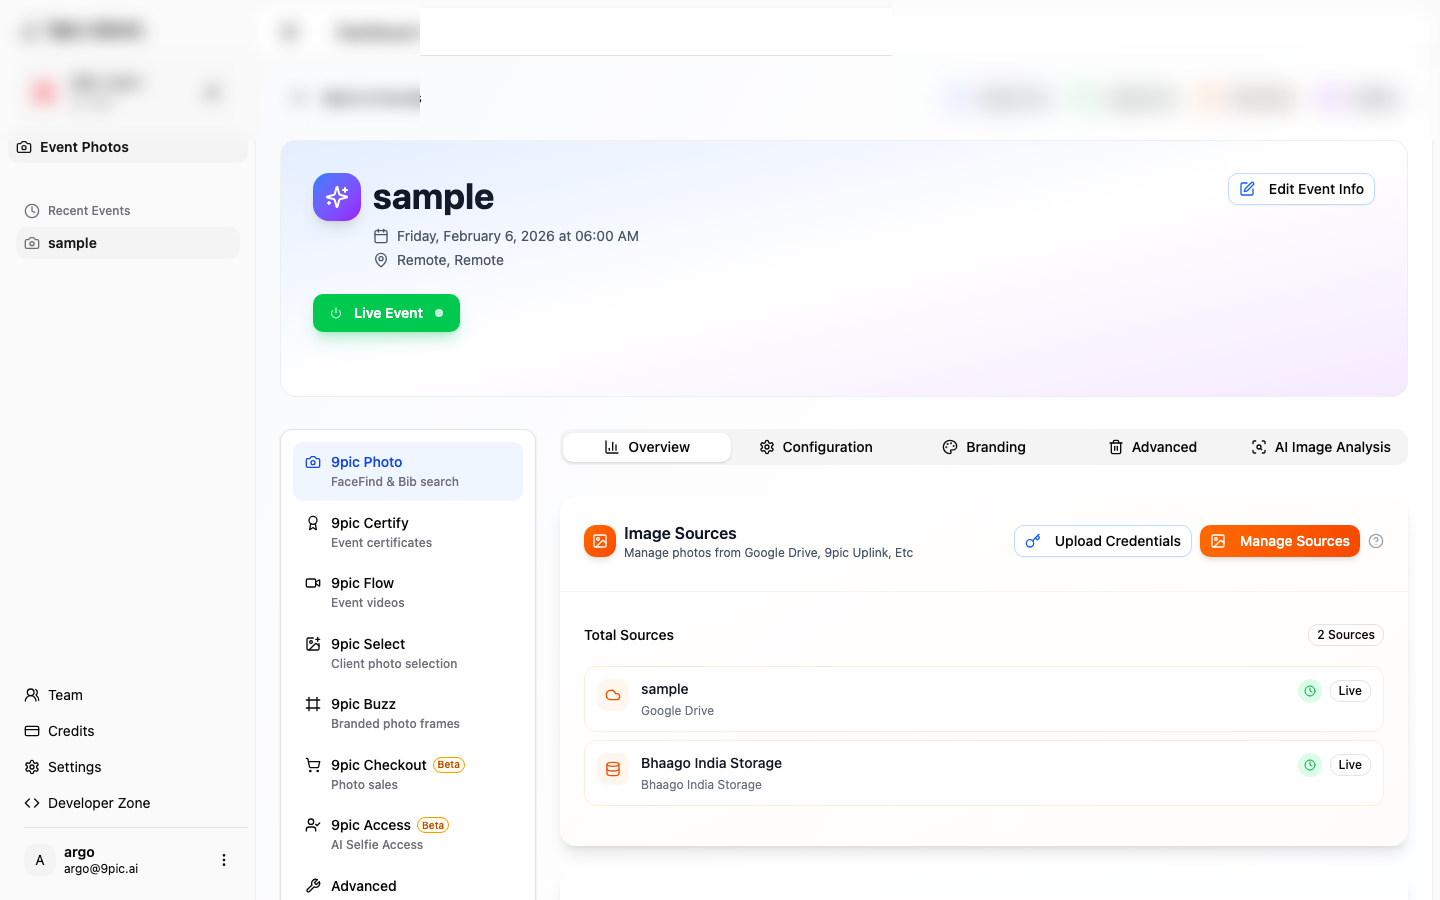
What You Can Do Here
- Manage Image Sources: connect Google Drive, Dropbox, OneDrive, AWS S3, or 9pic storage.
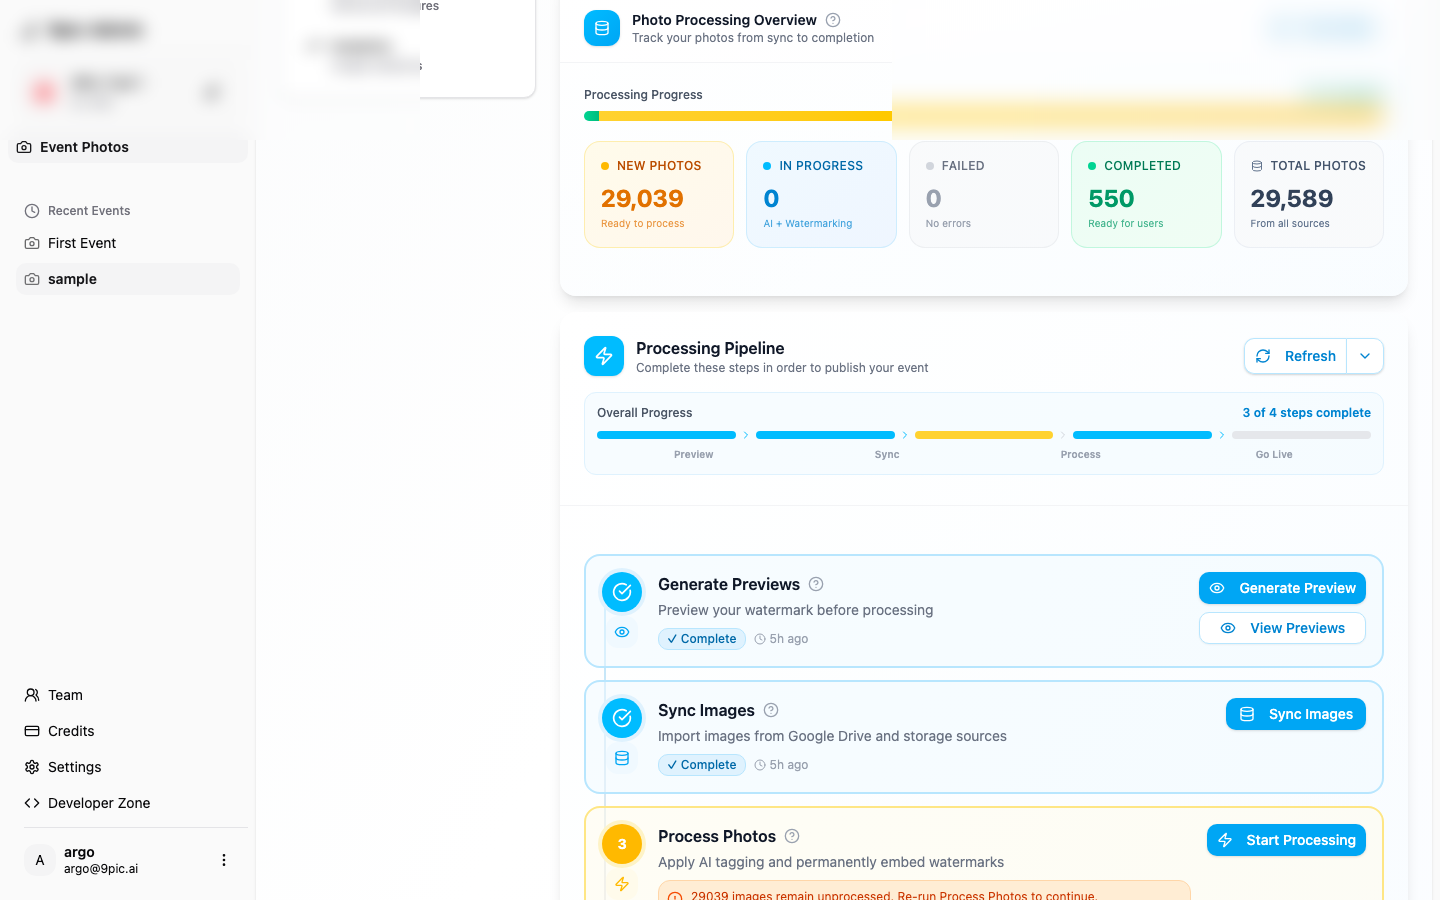
- Generate Preview: create watermarked previews before processing.
- Sync Images: import new photos from your sources.
- Start Processing: apply AI tagging + permanent watermarking.
- Go Live: publish the event for participants.
- Open AI Analysis: review rotated images and fix them when needed.
Step-by-Step Workflow
Add or review image sources
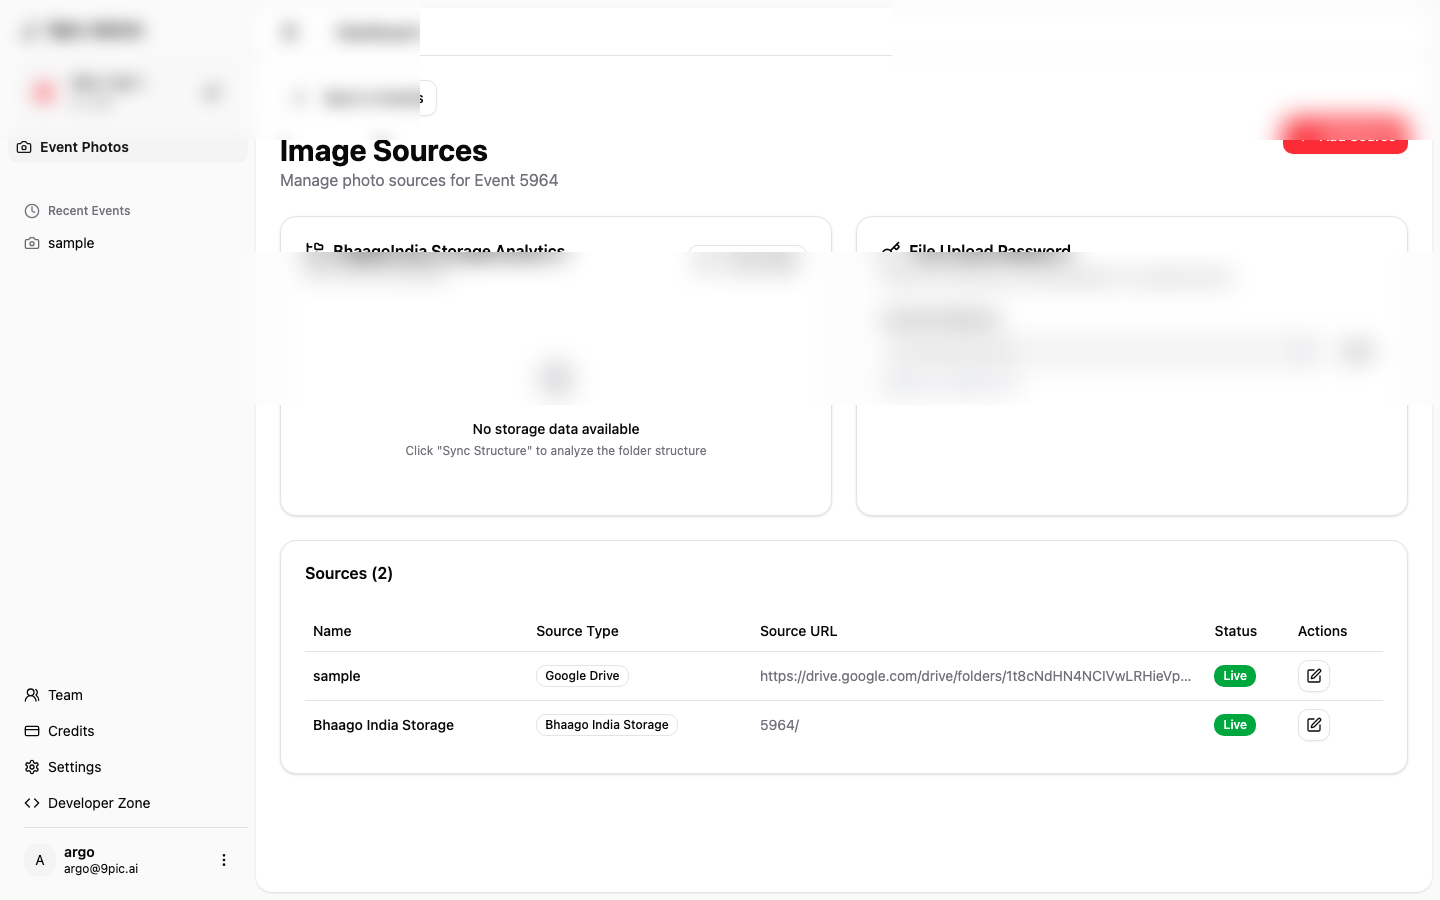
In Image Sources, click Manage Sources to connect your folders (or review what’s already connected).
Generate watermark preview
Click Generate Preview in the Processing Pipeline to check watermark placement before processing.
How to Add Sources
Image Sources tell 9Pic where your event photos live. After you connect a source, run Sync Images to import new photos.Before You Start
- Pick the single folder that will receive the event photos (avoid mixing multiple events in one folder).
- Make sure new uploads will land inside that folder (not a different subfolder).
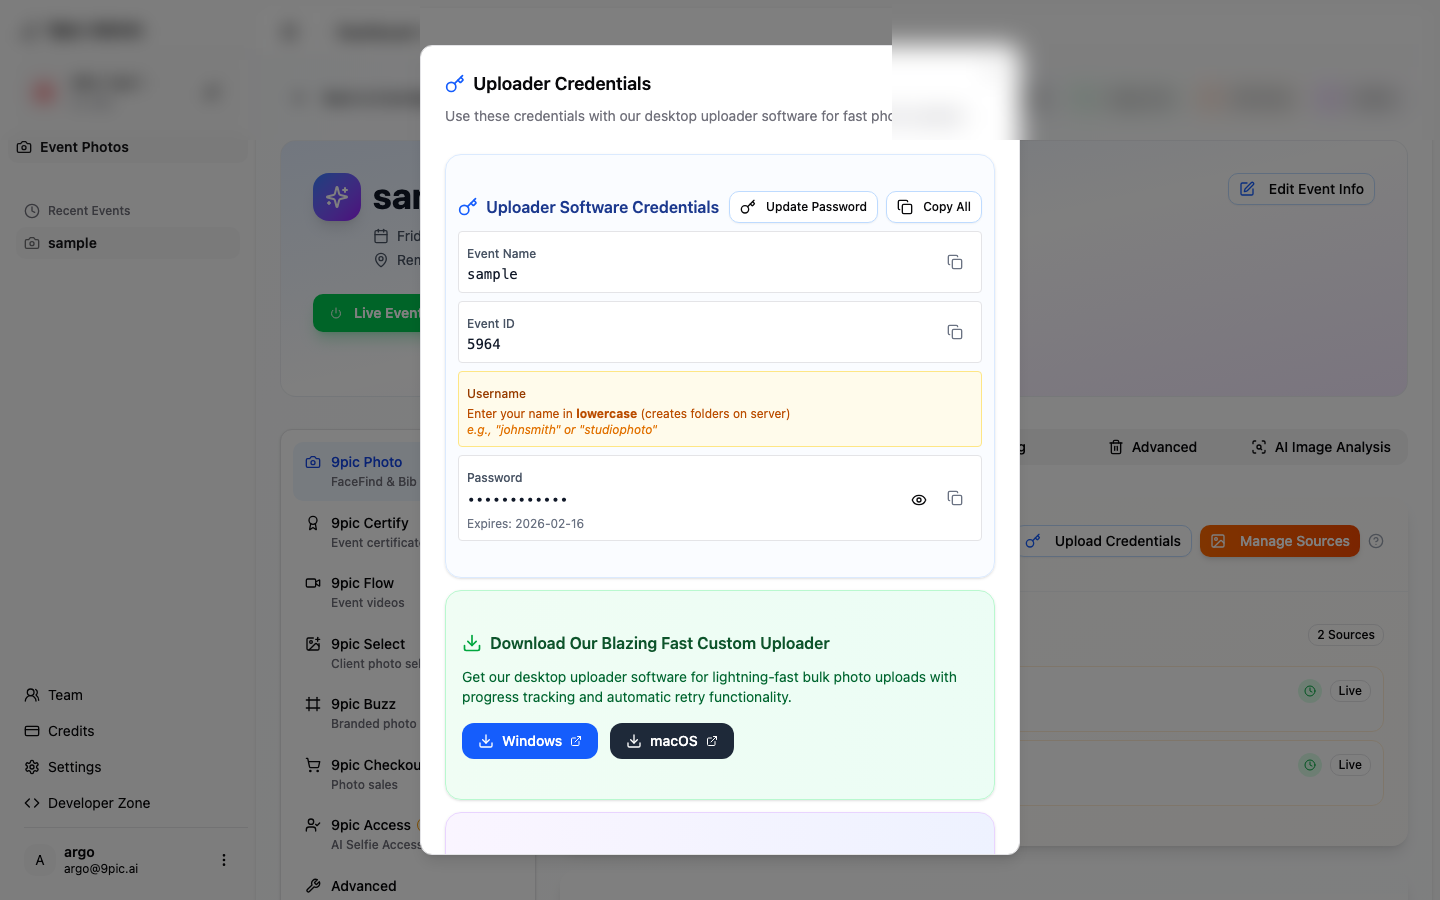
If you are adding Google Drive (or another external provider), you may need to connect credentials first.
Step-by-Step
Open your event and go to Photos Overview
Go to Event Photos, open your event, and stay on the Overview tab.
Upload credentials (if needed)
If you are using an external provider (for example, Google Drive), click Upload Credentials and complete the connection.
Add Source
Click Add Source, pick a Source Type, then paste the Source URL for the folder you want to import.
Confirm status is Live
After saving, make sure the source shows Live. If it doesn’t, open the source and fix the URL or permissions.
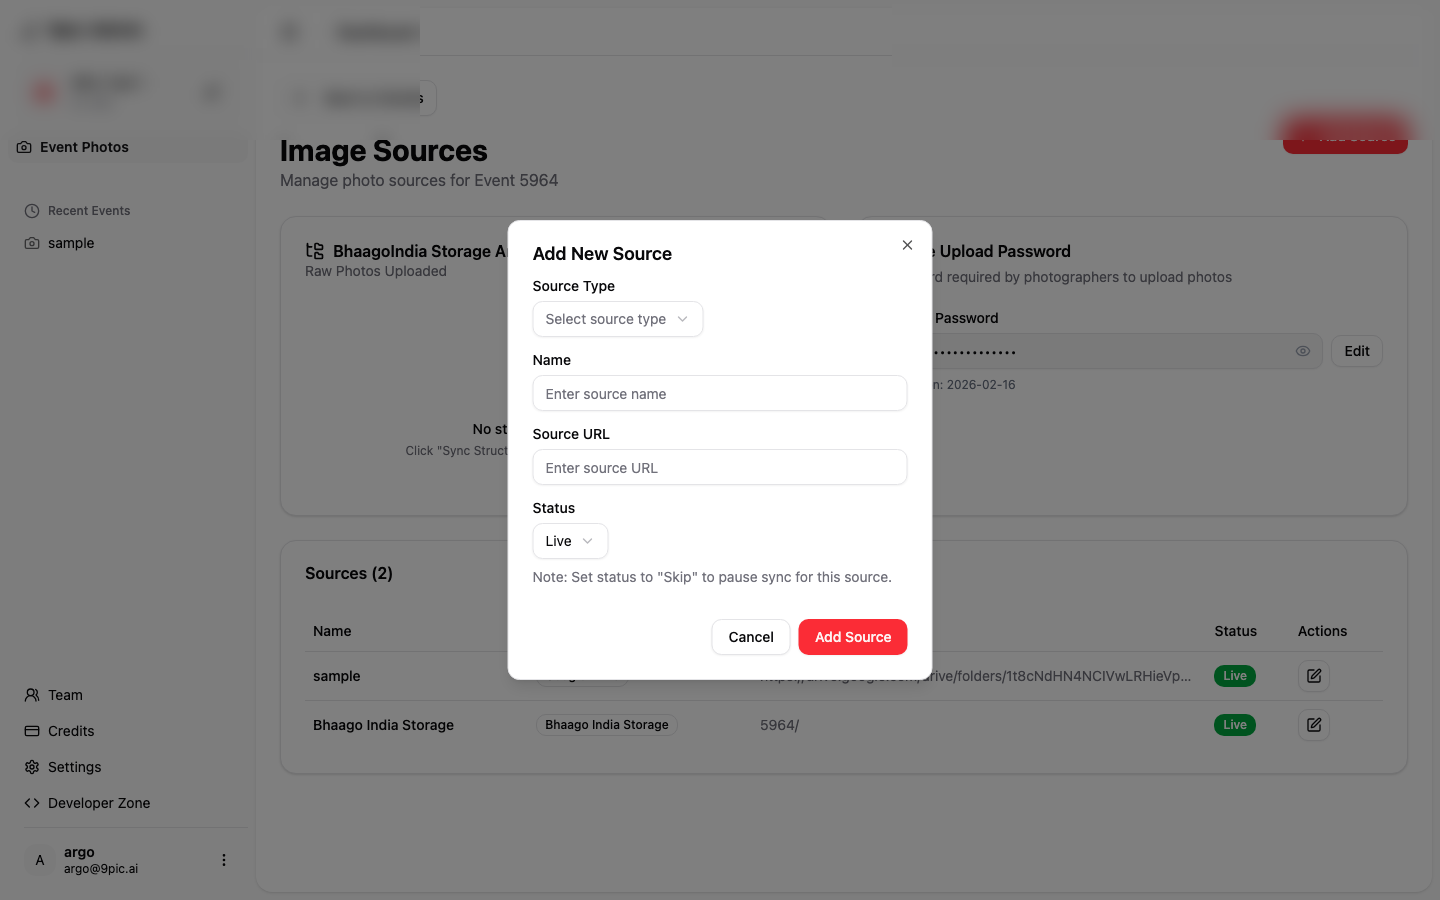
What to Paste in “Source URL”
Use the folder link for the provider you selected.Google Drive
Google Drive
Open the folder in Google Drive and copy the folder URL from the browser address bar. Paste the full URL into Source URL.
Dropbox / OneDrive
Dropbox / OneDrive
Open the folder in Dropbox/OneDrive and copy the folder link (the same link you would share with a teammate). Paste that into Source URL.
AWS S3
AWS S3
Use the S3 location your team configured for this event (bucket + folder/prefix). If you are not sure what to paste, contact support so we can confirm the correct format for your account.
9Pic Storage
9Pic Storage
Choose 9Pic Storage as the source type. If your organization has 9Pic Storage enabled, you can point the source to the event folder/prefix shown in Manage Sources.
Understanding Status
The Processing Overview card breaks your photos into statuses like New Photos, In Progress, Failed, and Completed so you always know what is happening.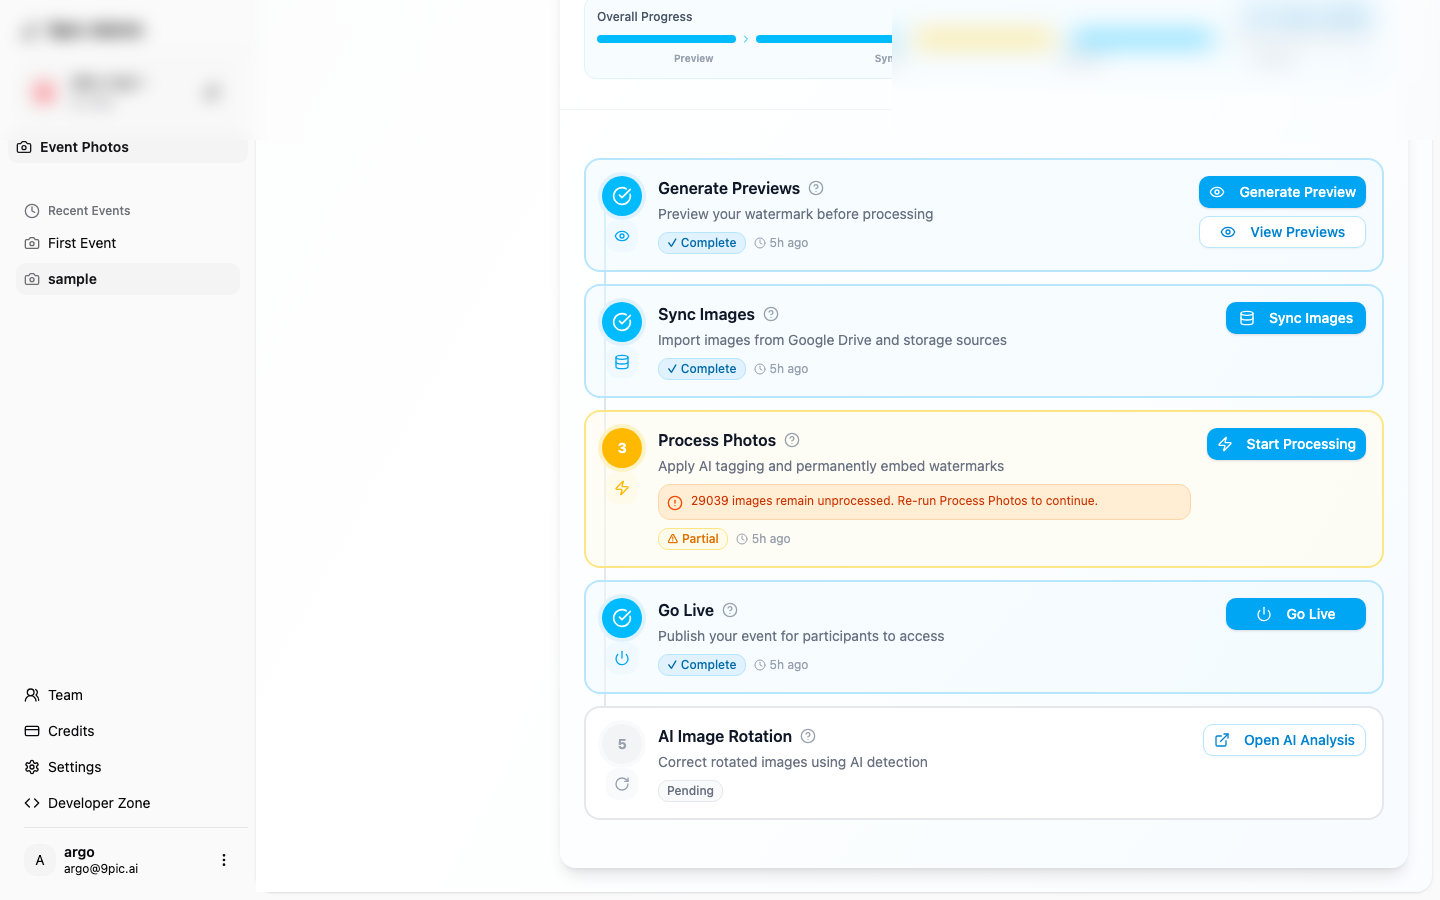
Troubleshooting
- Go Live is disabled: wait for Sync/Processing to finish or resolve errors shown in the pipeline.
- Go Live failed with “AI Image Analysis”: open AI Image Analysis to review rotated images, then run Process AI Rotation.
- Missing photos after sync: re-run Sync Images after confirming the source folder and permissions.
- Preview looks wrong: update your watermark in Branding and re-run Generate Preview.
Common Questions
Can I run Sync multiple times?
Can I run Sync multiple times?
Yes. Sync only imports new images, so it’s safe to run again after you add more photos.
Does Start Processing change my originals?
Does Start Processing change my originals?
It creates processed copies with watermarks. Originals stay in your source.
Why can’t I see any photos in the overview?
Why can’t I see any photos in the overview?
Make sure your sources are connected and Sync has completed successfully.