What This Guide Covers
In this guide, you will:- Create your first event.
- Add image sources.
- Run the event pipeline.
- Publish and test the event link.
Before You Begin
- You can log in at admin.9pic.ai/login.
- You have an event name, date, and event type ready.
- You have at least one source ready (9pic Uplink or cloud folder link).
First-time setup usually takes 10-20 minutes.
Full Walkthrough
Fill Event Details
Enter Event Name, Event Date, and Event Type.
For this walkthrough, you can use the name First Event.
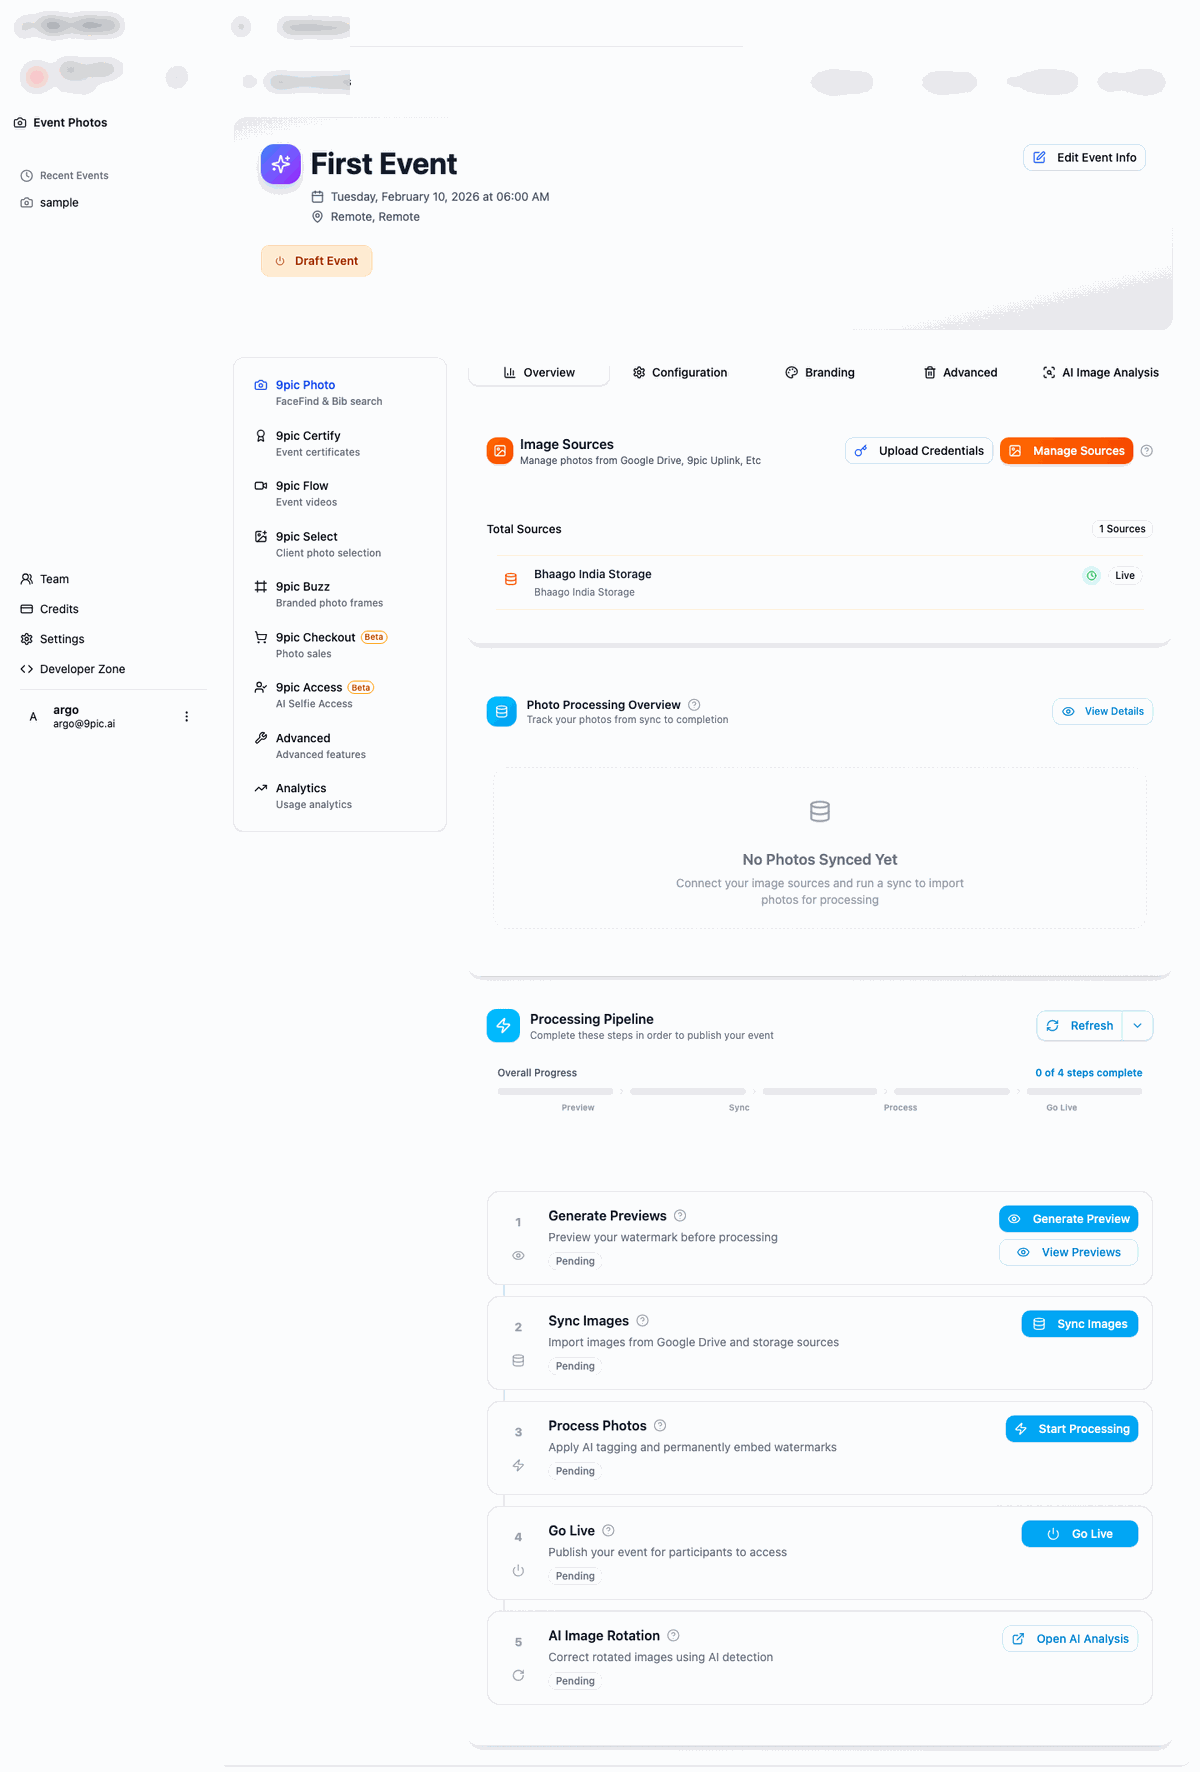
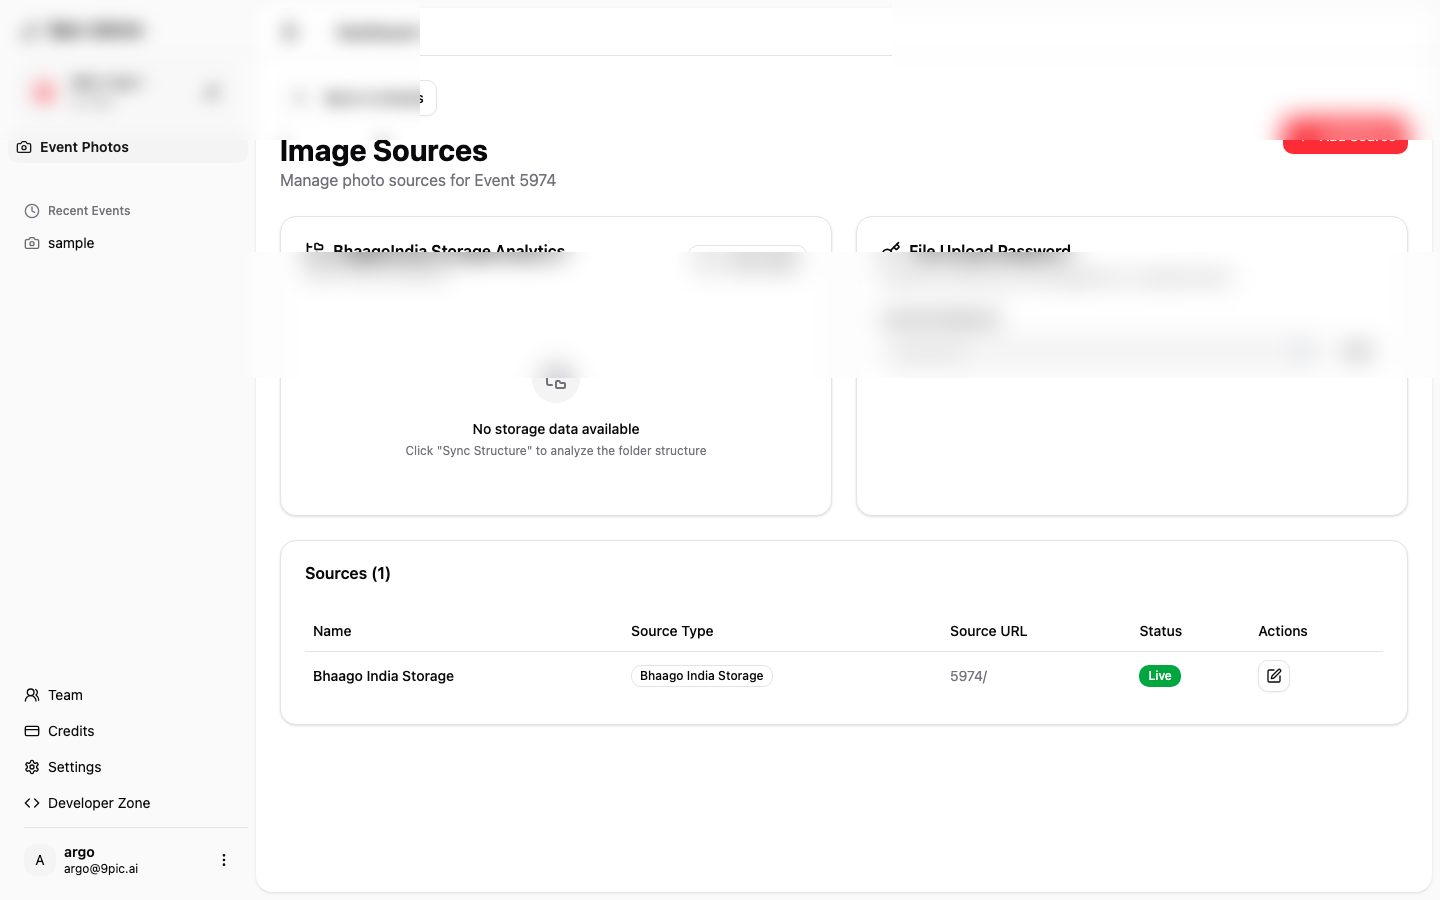
Add or confirm image sources
In Image Sources, click Manage Sources.
Keep Bhaago India Storage if available, and add cloud sources if needed.
Run the pipeline in order
Use Generate Previews (optional), Sync Images, Start Processing, and Go Live.
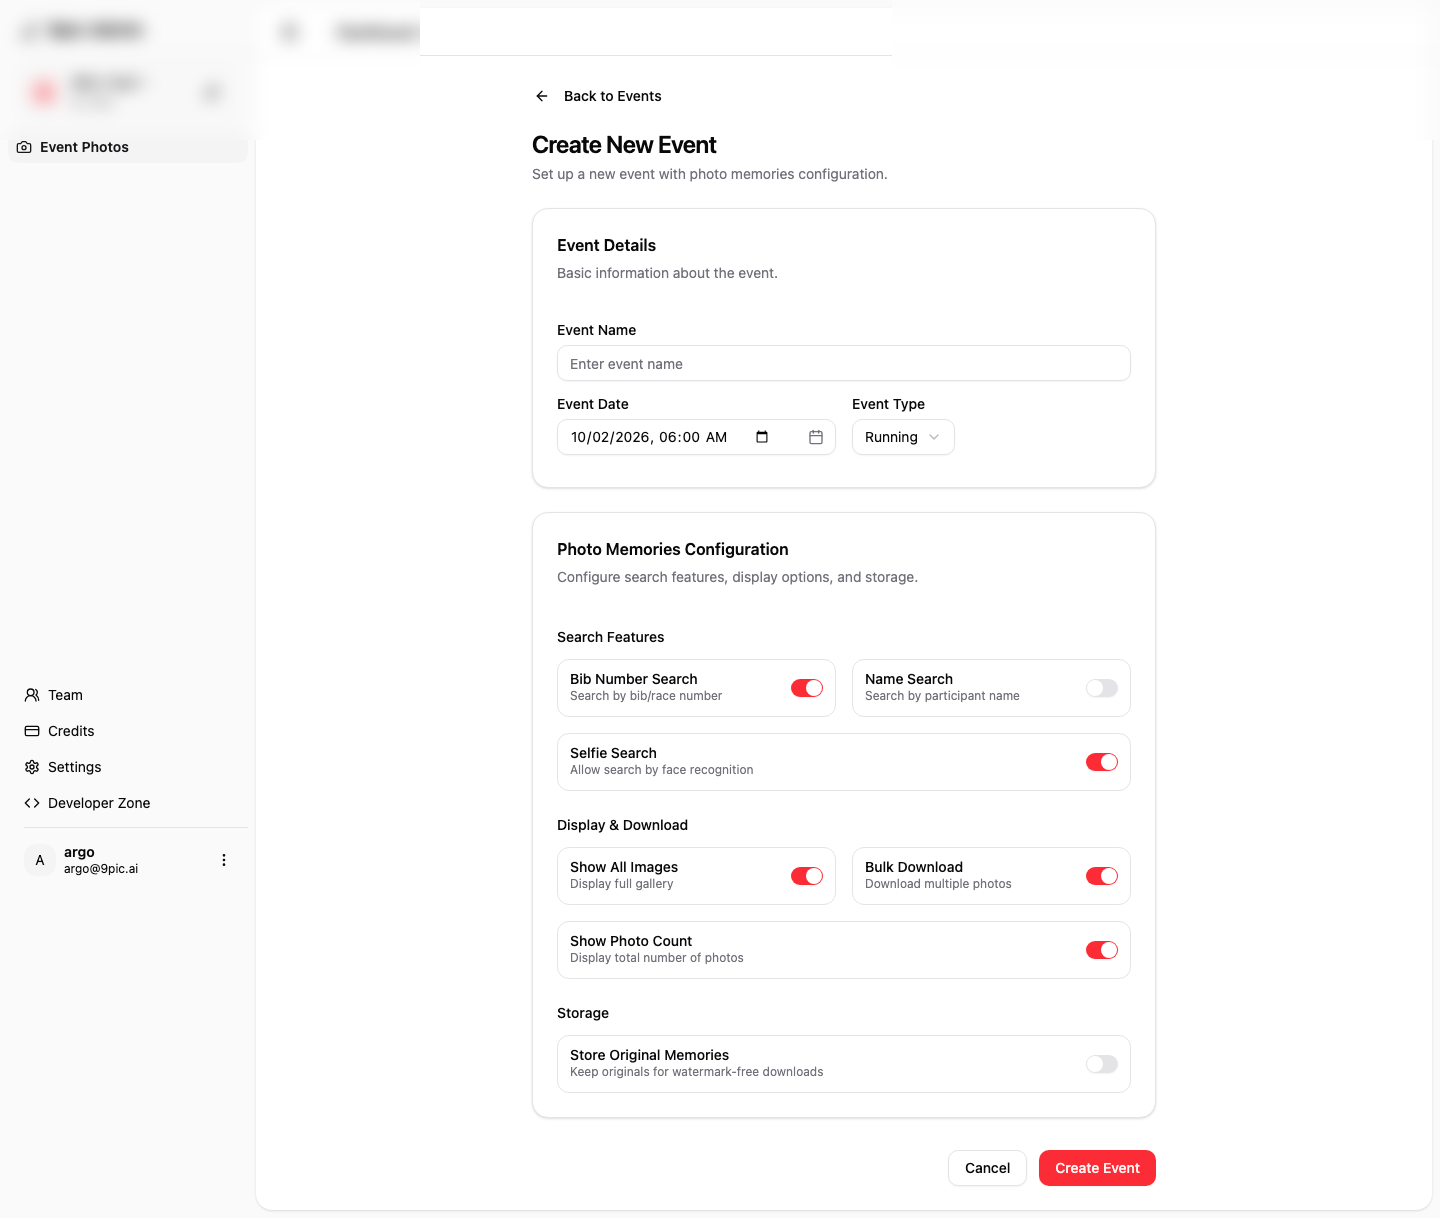

Choose Event Options Carefully
- Event Type: Choose this first. Running events unlock BIB-related options.
- Selfie Search: Enable if participants should find photos by face search.
- Show All Images: Enable if participants should see the full gallery.
- Bulk Download: Enable if participants should download multiple photos at once.
- Store Original Memories: Enable only if your plan and delivery model need originals.
Next Steps
Manage Events
Learn event settings and options in more detail.
Photos Overview
Go deeper into source management and processing behavior.
Troubleshooting
Fix common issues like missing photos, go-live failures, and rotation problems.