Why This Matters
Pro is when 9Pic earns its keep. An event run on Pro looks different from a trial event in three ways: it’s public on your branded domain, it can use every creative tool you’ve enabled, and your team is invited as separate accounts so setup isn’t blocked on one person. This page is the operator’s checklist for running a Pro-grade event from creation to share.Before You Begin
- You’re on Pro with branding, domain, and team invites already done. If not, run the Setup Wizard first.
- You have:
- At least 1,000 credits in your account (top up at Credits → Purchase Credits).
- Photos ready in 9Pic Storage (uploaded via 9Pic Uplink), Google Drive, or Dropbox.
- A clear answer to: Will participants find their photos via selfie (FaceFind) or BIB number (BibTrack)?
Steps
Create the event
From the dashboard sidebar, click Events → Create New Event.Fill in: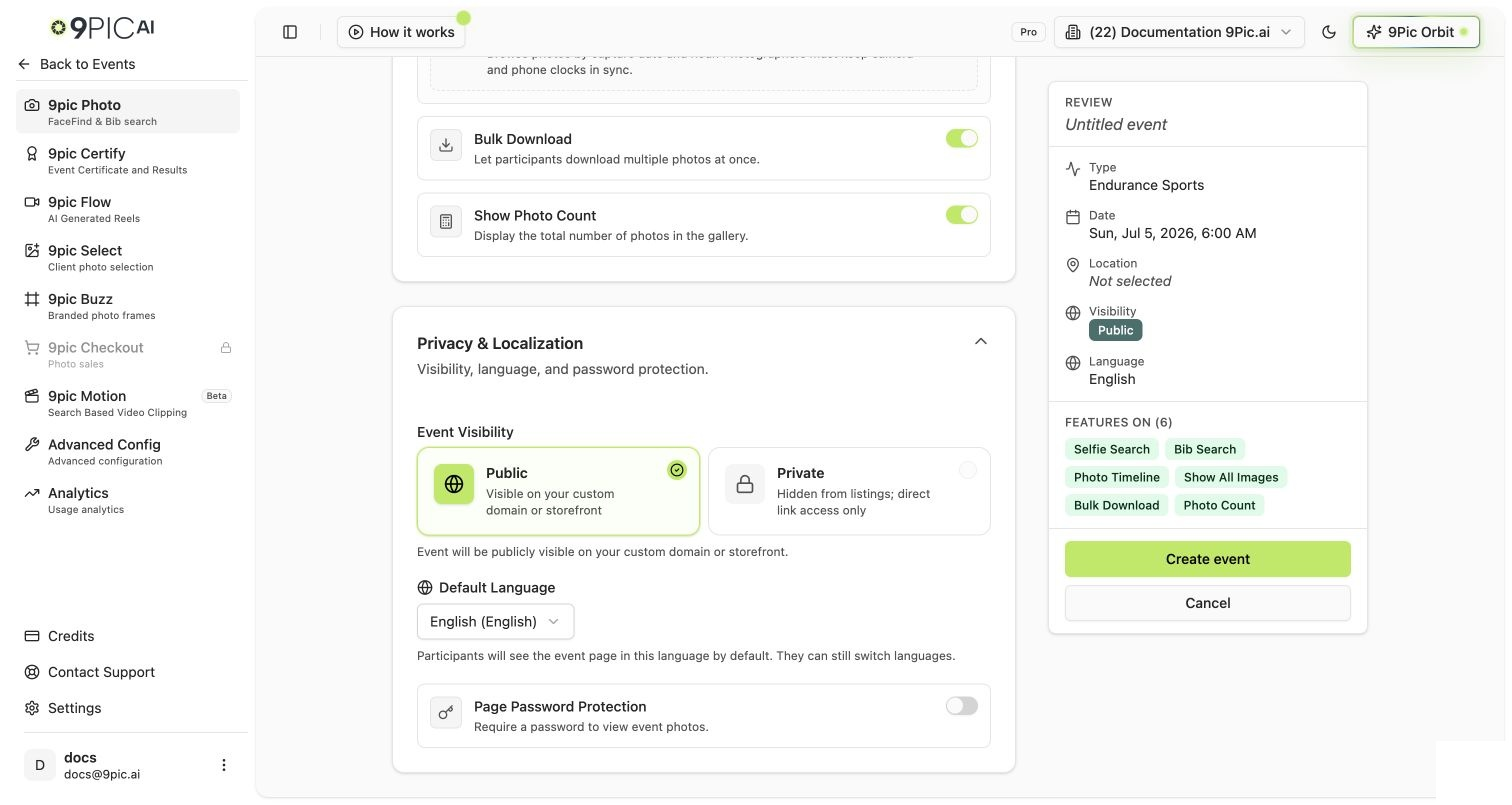
- Event Name — public-facing, so use the real event title.
- Event Date — the actual event date.
- Event Type — pick the closest match. Running events unlock BIB-related options.
- Platform Visibility — on Pro you can set this to Public (events listed on the public 9Pic listing) or Private (link-only). Trial accounts are forced to Private; Pro accounts are not.
Pick photo and search options
On the Photo Memories card:
- Selfie Search → on if you want 9Pic FaceFind (recommended for any event with attendee photos).
- BIB Search → on if you have race numbers, jersey numbers, or any printed identifier.
- Show All Images → on if participants should browse the full gallery.
- Bulk Download → on if you want a “Download all my photos” button.
- Store Original Memories → on only if you specifically need original-resolution archives. Originals consume more credits.
Open the event Details
From the Events list, click Details on your new event. The event workspace has a left sidebar with the products available on Pro: Photos, Certify, Flow, Select, Buzz, Motion, Advanced, and Analytics. Products you haven’t asked us to enable will be hidden — see What’s Unlocked.
Add image sources
On Photos → Configuration → Image Sources, click Manage Sources.
- Keep 9Pic Storage if you want to upload via 9Pic Uplink.
- Add Google Drive or Dropbox folders if your photos already live there. Paste the folder share link and grant 9Pic read access when prompted.
Sync and process
On the Photos → Processing tab, click Sync Images to pull from your sources, then run the processing pipeline. Each processed photo consumes 1 credit. Re-running Sync on the same photo doesn’t double-charge — only new photos count.
Watch credit usage on the event overview. If you’re running close to your balance, top up before you start a large sync — see Credits & Top-ups.
Brand and configure the event page
On Photos → Branding, set the per-event hero image, banner, and any event-specific copy. Your global branding (logo, theme color, header CTA) from Branding & Theme already applies — this tab adds event-specific decoration on top.For the broader configuration tab tour, see the dashboard guide: Photos overview.
Layer in creative tools
Pick the products that match your event:
- Want certificates of completion? → Buzz, Certify, Select.
- Want short AI-generated highlight reels? → Motion & Flow.
- Want client-proofing albums for a paid photographer? → Buzz, Certify, Select.
- Just photos and AI search? → Skip these tabs and ship.
Go live
On the event overview, click Go Live when you’re ready to publish. Use Open Link in the event header to preview the participant view; use Copy Link to share.Your event link uses your custom domain (
photos.yourbrand.com/events/...) if you’ve configured one — see Custom Domain.Recommended Defaults for a Pro Event
| Setting | Recommended for first Pro event | Why |
|---|---|---|
| Platform Visibility | Public | One of the headline reasons to leave the trial. |
| Selfie Search (FaceFind) | On | Default for any event with people’s faces. |
| BIB Search (BibTrack) | On for runs / triathlons / cycling; off otherwise | Saves processing time on non-numbered events. |
| Show All Images | On | Most participants want to browse, not just search. |
| Bulk Download | On | Improves participant experience dramatically. |
| Store Original Memories | Off | Only flip on for archival jobs — costs more credits. |
| Branding (per event) | Use the global theme by default | Per-event branding is for special launches, not every event. |
Common Questions
Do I have to set every event to Public on Pro?
Do I have to set every event to Public on Pro?
No. Pro just lets you make events Public. Plenty of Pro events stay Private (link-only) — for example, internal corporate events or family weddings. The choice is on a per-event basis.
My creative tool tabs (Certify, Buzz, etc.) are missing.
My creative tool tabs (Certify, Buzz, etc.) are missing.
They’re enabled by request on Pro. Email support@9pic.ai and tell us which products you want turned on for your organisation. This is a one-time switch, not a per-event one.
How do I split work across my team on event day?
How do I split work across my team on event day?
Invite teammates as Admins or Operators from the Team page. Photographers can drop photos into the linked Google Drive / Dropbox folder while the event lead runs Sync and Go Live. See Team Setup.
Can I run multiple events at once?
Can I run multiple events at once?
Yes. There’s no per-organisation event limit on Pro. Each event is its own workspace with its own sources, processing run, and analytics.
What if I run out of credits mid-event?
What if I run out of credits mid-event?
Processing pauses on the affected event and the overview tab shows a credits-blocking notice. Top up at Credits → Purchase Credits (1,000-credit minimum) and resume processing. Credits already-processed photos are unaffected. Full reference: Credits & Top-ups.
Next Steps
FaceFind & BibTrack
Tune AI search for production-scale events.
Motion & Flow
Add short videos and AI reels to your gallery.
Buzz, Certify, Select
Frames, certificates, and client proofing.
Photos Reference
Full Dashboard Guide reference for the Photos product.