

Overview
This page is the shortest path from dashboard home to “my first event has photos”, and it is the same on every plan. Plan differences are in the table below. Deeper references for every option live in the Events section and the product pages.Expect about ten to twenty minutes total: the form itself takes under a minute, but importing and processing photos depends on how many images you have.
Before You Start
You need three things:- An organiser account on 9Pic — see Sign in if you haven’t signed in yet.
- An event name, date, and city or venue.
- At least one source of photos: a folder of images you can upload, 9Pic Uplink, or a cloud folder link (Google Drive, Dropbox and similar). You can also add sources after the event is created.
What Depends on Your Plan
The steps are the same on every plan. These are the parts that change:
Processing photos uses credits on every plan: 1 credit per photo when Selfie Search or Bib Number Search is on. See Compare plans for prices and everything else that differs.
The Happy Path
1
Click Create New Event
From dashboard home, click the Create New Event card in Quick Access. (You can also click Events in the sidebar and then the Create button in the top-right.)
2
Fill in the basics
Enter an Event Name (you can use something like First Event), pick an Event Date and start time, and select your Event Location from the suggestions.
3
Pick an Event Type
Choose Endurance Sports, Social Events, Conference, or General. Picking Endurance Sports unlocks bib number search.
4
Accept the default Photo Memories Configuration
For your first event, leave Selfie Search, Show All Images, Bulk Download, and Show Photo Count on (the defaults). You can change these later from the event’s Configuration tab. Under Event Products, a product your plan doesn’t include shows Available on and the plan that has it.
5
Check visibility
Under Privacy & Localization, Event Visibility is Public or Private (link only). On Trial, Public is locked and the review panel shows Private (Trial).
6
Click Create Event
The button is at the bottom of the form. Once the event is created, its details open straight away on the 9pic Photo product, Overview tab. To come back to it later, click its row (or Configure) in the Events list.
7
Add a source
On the Import Photos card, the Sources panel lets you Upload photos to 9Pic Storage, Add source for a cloud folder link, or Manage existing sources. See Managing sources.
8
Import, then process
Choose Import Photos to pull photos in from your sources, then Start Processing on the Process Photos card. Before it starts, the dialog shows how many credits the batch needs and your balance; if you’re short, add credits first.
9
Publish and test
Once processing finishes, choose Publish on the Publish Event card. Use Open Link in the event header to try the participant page yourself: search with a selfie and, for a race, a bib number. See Test photo search.
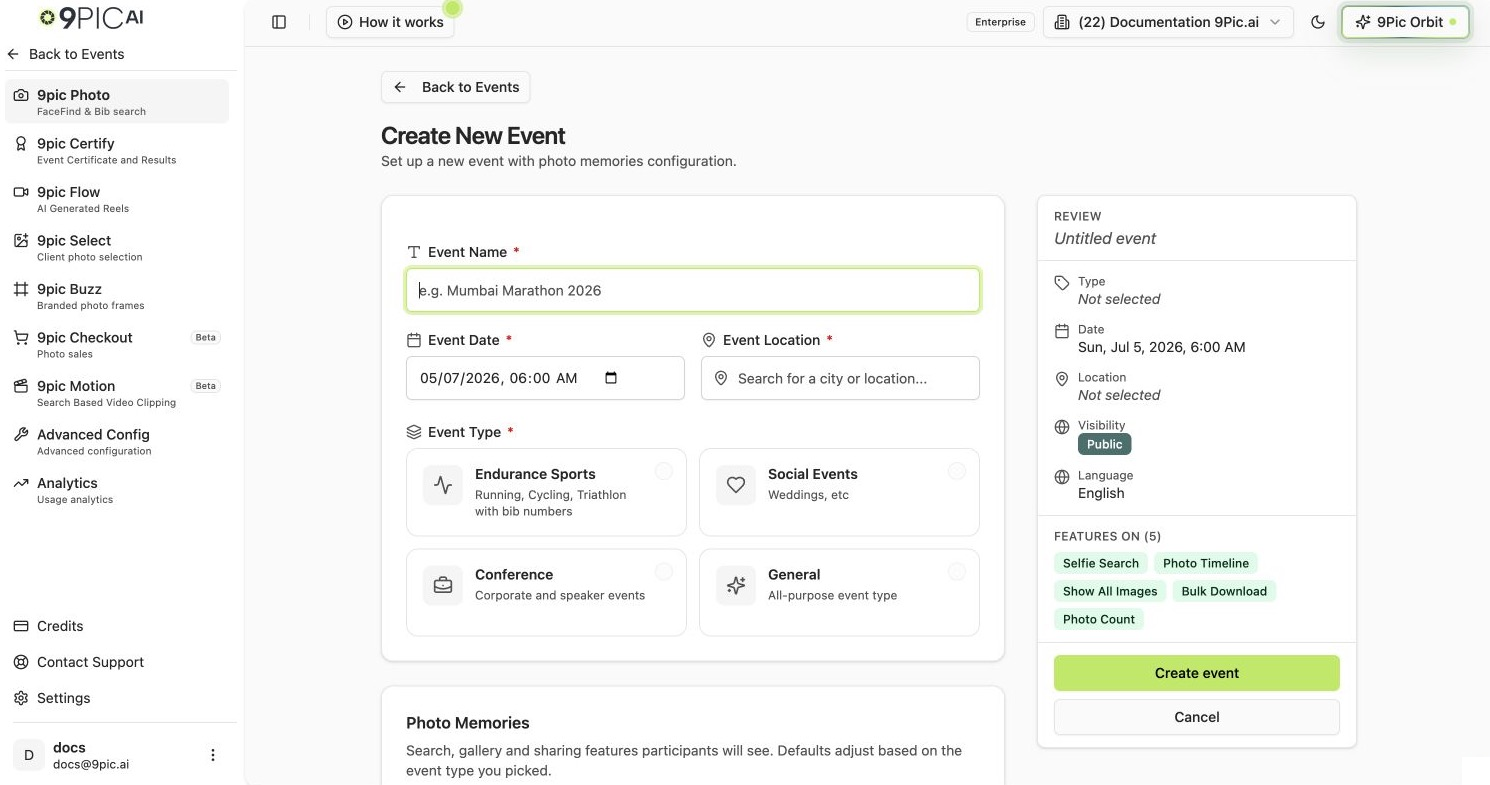
Create New Event basics
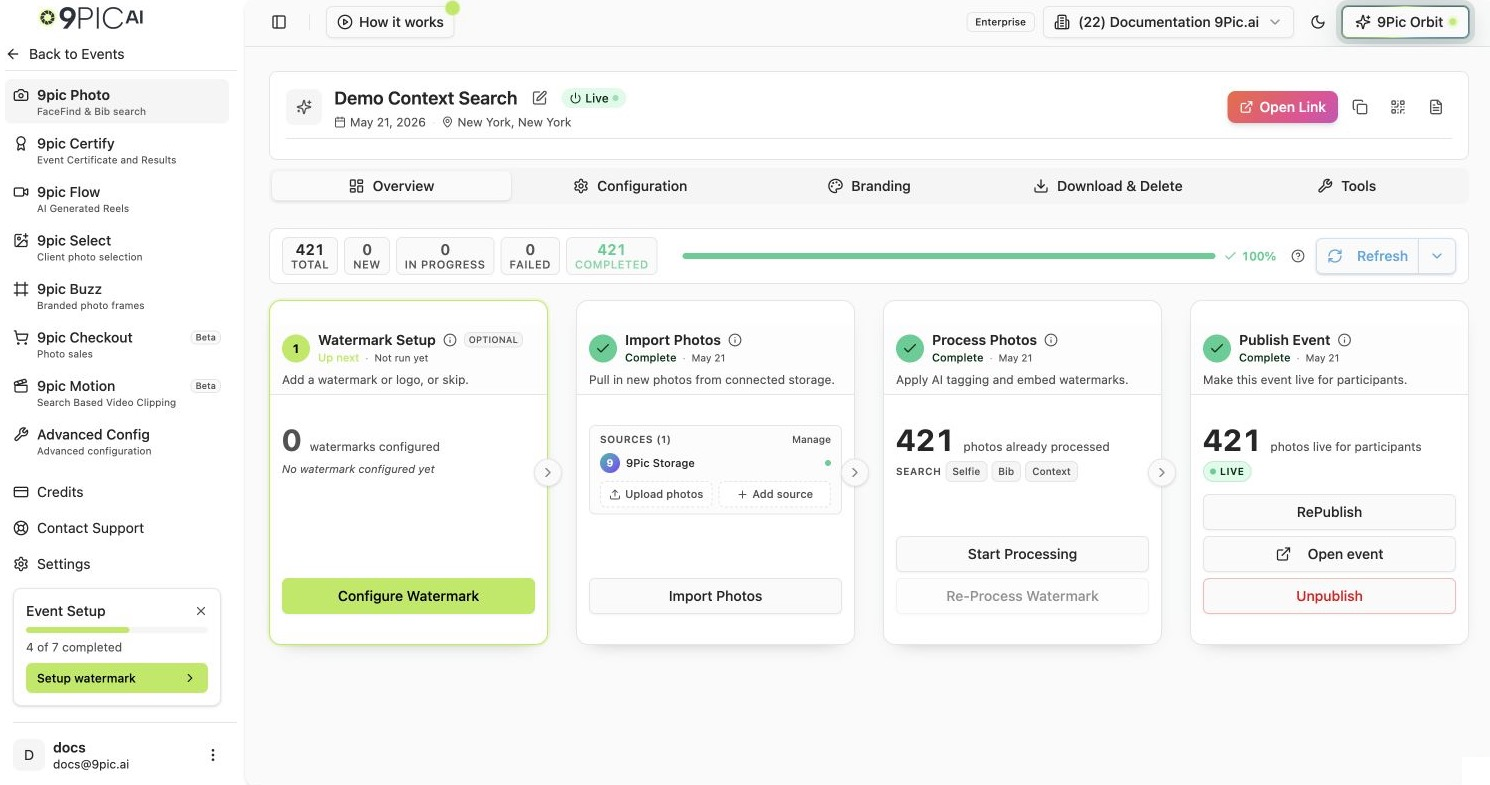
Photo Overview after opening an event
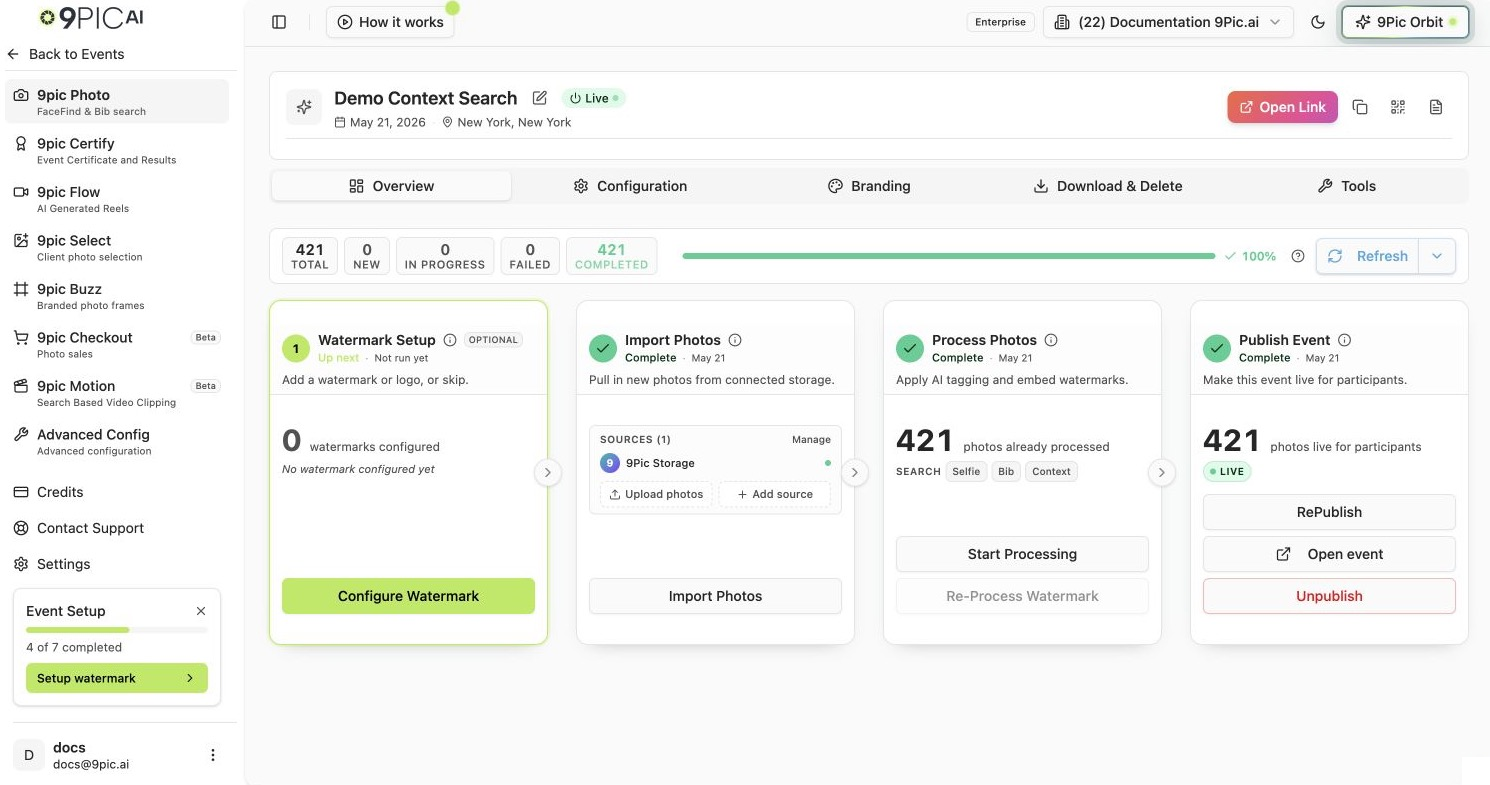
Event header actions
What You Just Did
Credits on Your First Event
- Creating an event, importing photos and publishing don’t use credits. Processing does: 1 credit per photo when Selfie Search or Bib Number Search is on, and none when both are off.
- Get the watermark right before processing. Changing it afterwards means Re-Process Watermark, which costs 10% of your processed photo count (500 credits for 5,000 photos).
- Test with a small batch first. Process about 100 photos, check the watermark and search results on the participant page, then process the rest.
- Top up before the event, not during it. If a batch needs more credits than you have, processing won’t start until you add credits; photos already processed stay live. See Buy credits and Avoid wasting credits.
Choose Smart Defaults for Later
Once your first event works end-to-end, revisit these options for the next one:- Bib Number Search — for races. Upload a name-to-bib CSV later to also enable name search.
- Selfie Search — face-recognition photo search. Defaults to on.
- Show All Images — lets participants see the full gallery, not only their matches.
- Bulk Download — lets participants download multiple photos at once.
- Store original photos (Business, Custom and Enterprise; open to try on Trial) — the highlighted switch below the event details. Keeps original files for watermark-free downloads and photo sales, and also turns on 9pic Checkout. It can only be turned on while creating the event. May incur extra storage charges.
- Event products — on Pro and above, add Motion, Flow, Certify, Buzz or Select to the event in Event Config.
If Something Goes Wrong
My event shows zero photos after import.
My event shows zero photos after import.
Open Manage in the Sources panel and confirm the source is Live and reachable. For cloud folders, double-check the share link is accessible. See No photos after import.
Processing won't start or stays stuck.
Processing won't start or stays stuck.
Check your credit balance from the sidebar — processing needs enough credits for the batch. Top up from Credits & Billing, then choose Start Processing again. See Credits blocking processing.
I can't publish.
I can't publish.
Publish becomes available only after processing has produced searchable photos. Wait for processing to finish before publishing. See Go Live failed.
Search doesn't find faces or bibs.
Search doesn't find faces or bibs.
Confirm Selfie Search or Bib Number Search was on before you processed. See Search not working.
If I upgrade from Trial, does my test event become public?
If I upgrade from Trial, does my test event become public?
No. Your event link moves from
trial.9pic.ai to app.9pic.ai, but events you created on Trial stay Private until you change their visibility in Event Config.Next Steps
Test photo search
Check selfie and bib search on your gallery.
Invite your team
Bring a teammate in to review or run events with you.
Create an event (full reference)
Field-by-field reference for every option in the new event form.
9Pic Photo overview
Deeper coverage of sources, importing, processing, and watermarking.
Stuck for more than fifteen minutes? Email support@9pic.ai with your organisation name and event ID and we will jump in.