

Overview
Event Config holds the event-level settings that shape the public event page and the event’s product menu. It is available on all plans. Event Config has a row of tabs. Most tabs have a section menu on the left, and the first section opens by default: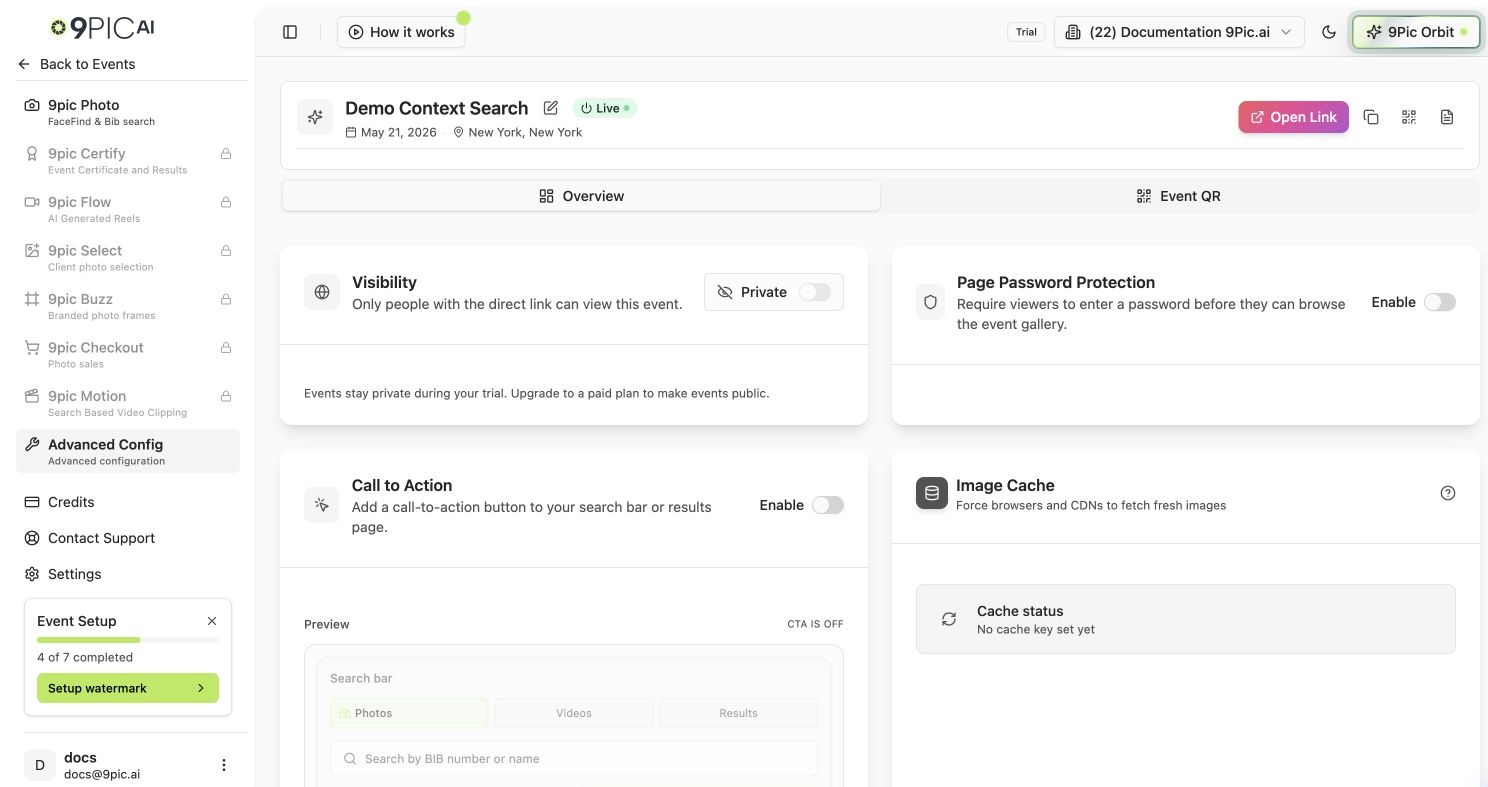
Event Config
Saving your changes
There are no Save buttons inside each section. As soon as you change something, a floating bar shows You have unsaved changes with Discard and Save changes. Save changes saves every changed section at once, so you can adjust the banner, call to action, language, products and visibility and save them together. The bar stays while you move between tabs and sections, and a small dot marks a tab or section with unsaved changes. The image cache, Event QR and Archive act on their own, and the landing page is saved inside its builder.Event Banner
The event banner is the wide cover image at the top of the participant event page, above the event name and search. It shows for photos and videos. It used to be edited from the Photo Branding tab, which is now called Watermark.1
Open Event Banner
Go to Event Config → Event Page. Event Banner is the first section.
2
Turn on the banner and add an image
Turn on Show a banner, then upload an image or paste an image link in the field below the switch. Wide images work best, about 1920 × 400 px; keep important details near the centre.
3
Check the preview
The Participant view below shows the event page with your banner. Switch between Desktop and Mobile. The preview updates as you edit, before you save.
4
Save
Click Save changes in the floating bar. The banner saves together with your other Event Config changes.
Landing Page
Event Config → Event Page → Landing Page replaces the old Participant Page card on the Photo tab. It shows:- Whether participants see the Default gallery (search, then the photo gallery) or a Custom page (your own content above the photo gallery, or without it).
- Open live, which opens the event’s participant page in a new tab once the event has a link.
- Build a landing page (or Edit in builder once you have a custom page), which opens the landing page builder. Choose a layout, add content and preview it on desktop and mobile, then save it inside the builder.
- A live Participant view of the event page.
Products
Photo and Uplink are always on. They show as icons under the list; select one to open it. Certify, Flow, Select, Buzz, Checkout and Motion each have a switch that adds the product to the event’s menu.- Switching a product on needs a plan that includes it: Pro for Certify, Flow, Select, Buzz and Motion, and Business for Checkout. On the Trial you can switch on Certify, Buzz and Checkout (test mode).
- A product your plan doesn’t include shows Available on and the plan name instead of a switch.
- Switching a product off is always allowed. It only removes it from the menu; it doesn’t delete its data or stop participant features.
- After you save, each product that is on has an Open button that takes you straight to it.
Visibility & access
On the Access & Sharing tab. Its other section, Event QR, is covered in Event QR.On the Trial plan, events stay Private. Public events unlock on Pay As You Go and above.
Call to action
On the Event Page tab. Turn on Call-to-action button to send participants from your gallery to registration, a store or your website. Its options appear right below the switch:
The previews show your real event page with your unsaved edits. Use the desktop and phone buttons to switch both. If you save from another tab while the button has no link, the save bar says so and Open Call to action takes you back here.
Pass participant context to your URL
When a participant clicks a CTA, 9Pic appends query parameters to your link so you can personalize the destination:
Because
ref is Base64-encoded, decode it on your page:
Language
On the Event Page tab. Default language chooses the language participants see first on the event page. They can still switch languages there.Maintenance
The first section of the Advanced tab.Archive or Restore an Event
1
Open Archive
Choose Event Config → Advanced → Archive, the red item below Maintenance. The Events list’s Archive event and Unarchive event menu entries open it directly. You can also search for archive, unarchive, restore, delete event, or delete album in the navbar or Home search. Home asks you to choose a recent event or find one by name first.
2
Review and confirm
Save or discard pending changes first; Archive is disabled while there are unsaved changes. Click Archive event, review what changes, and confirm. Opening the section alone changes nothing.
3
Restore later
On an archived event the menu item reads Restore and the rest of Event Config is unavailable. Click Unarchive event and confirm to return the event to Active with status Not Assigned. Event Config then opens Event Page so you can review settings and go live again when ready.
Common Questions
Where did my old Event Config section go?
Where did my old Event Config section go?
Products has its own tab, Visibility & access and Event QR are on Access & Sharing, Call to action and Language are on Event Page, and Maintenance and Archive are on Advanced. Older links open the right tab and section.
Do I need to refresh the cache after a watermark change?
Do I need to refresh the cache after a watermark change?
Only if viewers are still seeing the old watermark. Refreshing makes them load the latest images.
Why is Archive greyed out?
Why is Archive greyed out?
You have unsaved changes. Click Save changes or Discard in the floating bar, then open Archive.
Next Steps
Event QR
Generate and customise the event QR code.
Download & Delete
Download originals and delete photos.