Why This Matters
Running an event on Pay As You Go is operationally identical to running one on Pro — same gallery, same sync, same AI search. The difference is the meter is on. This page walks through the same end-to-end flow as the Dashboard Guide, but with the credit cost called out at every step so you know what’s about to come out of your balance. For deep-dive reference on any single step, link out to the corresponding Dashboard Guide page.Before You Begin
- You’re on the Pay As You Go plan (your sidebar shows the Pay As You Go badge).
- You have an idea of how many photos this event will produce. Multiply by ~1.1 to estimate credit cost (1 credit per processed photo with AI on, plus a small buffer).
- Your available credits balance covers your estimate. Open Credits in the sidebar to confirm.
- You’re an admin of the organisation. Operators can run events but cannot top up credits.
The 7-Step Event Flow on Pay As You Go
Create the event
Sidebar → Events → Create Event.On Pay As You Go you can set Platform Visibility to Public (trial accounts couldn’t). Public events are accessible at 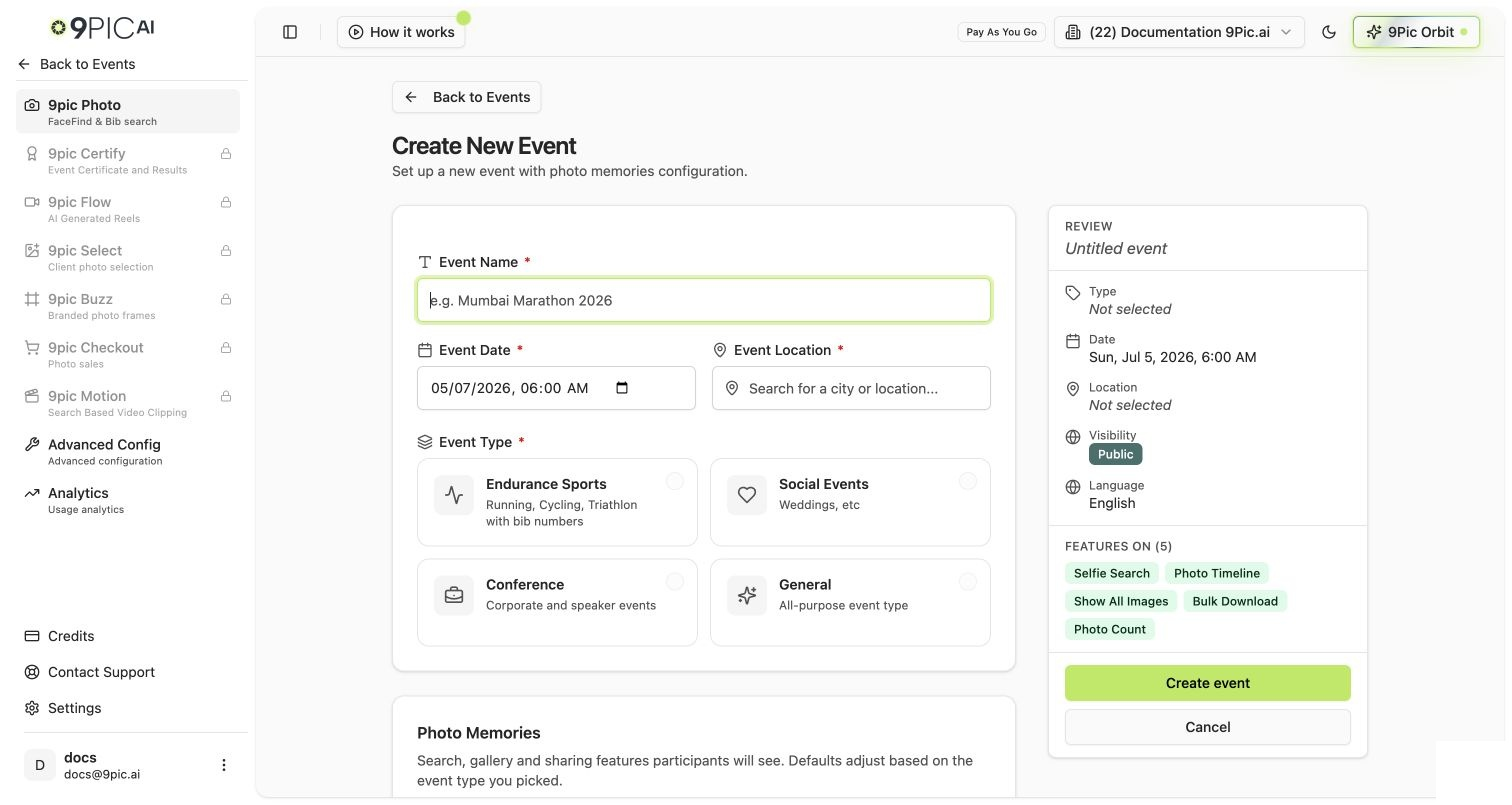
app.9pic.ai/<event-slug> to anyone with the link.Credit cost: 0. Creating an event is free.Decide on AI search settings (this drives your bill)
On the event details page, open the Configuration tab and check:
- Enable Selfie Search (powered by 9Pic FaceFind)
- Enable BIB Search (powered by 9Pic BibTrack)
Upload photos with 9Pic Uplink (or drag & drop)
Use 9Pic Uplink (desktop uploader) for large batches, or drag & drop directly into the event gallery for small batches.Credit cost: 0 for the upload itself. Photos sit in Pending state and don’t consume credits until you process them.See Camera Configuration Guide for camera settings that produce the best AI search results.
Process the photos (this is where credits move)
Click Sync Images → Process Photos. The dashboard shows you:
- The number of pending photos waiting.
- Your available credits balance.
- Whether the batch fits in your balance.
Brand the gallery (the basics)
Open the Branding tab on the event:
- Cover image — a gallery banner.
- Watermark — your logo or text overlay applied to processed photos.
- Event name & description — public-facing copy.
Go live and share the public link
On the event overview, click Go Live. The dashboard runs the go-live checks (watermark configured, at least one processed batch, etc.) and flips the event to public.Share the public link
app.9pic.ai/<event-slug> with attendees. They can browse, search by face (FaceFind), or search by BIB (BibTrack) depending on the toggles you set in Step 2.Credit cost: 0 for going live. Search-side queries don’t consume your credits — your bill is set at processing time.See Go-Live Failed troubleshooting if go-live fails.(Optional) Re-process watermark only if you really need to
If you go live and then realise the watermark is wrong, you can re-apply the new watermark to all already-processed photos.From the event details, open Reprocess Watermark. The dashboard tells you exactly how many credits this will cost: 10% of your processed photo count. Re-watermarking 5,000 processed photos uses 500 credits.BIB tags, selfie-search index, and all other data are preserved — only the watermark overlay changes.
Credit Costs at a Glance for One Event
For a typical 5,000-photo public event with FaceFind enabled, BIB Search off, and Store Originals off:| Action | Credit cost |
|---|---|
| Create event | 0 |
| Upload 5,000 photos | 0 |
| Process 5,000 photos with FaceFind on | 5,000 |
| Brand & go live | 0 |
| Re-process watermark if you need to fix it post-launch | 500 |
| Best case (no re-process) | 5,000 credits |
| Worst case (one re-process) | 5,500 credits |
Common Questions
Can I run an event with AI search disabled to save credits?
Can I run an event with AI search disabled to save credits?
Yes. If both Enable Selfie Search and Enable BIB Search are off, processing those photos uses 0 credits. The trade-off is your attendees won’t have face search or BIB search — they’ll have to scroll the gallery manually. For internal-only galleries, this is fine.
My credits ran out mid-event. What now?
My credits ran out mid-event. What now?
Already-processed photos stay live and searchable. New photos queue and wait in Pending state. Top up at Credits → Purchase Credits (minimum 1,000 credits), then click Sync Images again on the affected event. Processing resumes automatically.
What does Sync Images do?
What does Sync Images do?
Sync Images pulls newly uploaded photos into the dashboard and stages them for processing. It doesn’t consume credits — the actual processing step (which applies AI search and watermarking) is what uses credits.
How long does processing 5,000 photos take?
How long does processing 5,000 photos take?
Processing is asynchronous. For a typical event, expect under 30 minutes for several thousand photos. The event details page shows a live progress bar. You can close the tab — processing continues server-side.
Can my team upload while I'm processing?
Can my team upload while I'm processing?
Yes. Uploads queue independently of processing. Operators can keep adding photos via 9Pic Uplink while the previous batch is being processed.
Next Steps
Photo Processing Costs
The full credit-cost cheatsheet by action type.
Avoid Credit Foot-Guns
The 5 mistakes that burn the most credits.
Manage Credits
Watch your balance and monthly usage.
Photos Reference
Full Dashboard Guide reference for the Photos product.