Why This Matters
Topping up on Pay As You Go takes about 90 seconds when you know the steps. This page walks through the exact dashboard flow so the first top-up isn’t a guessing game and the tenth one is muscle memory.Before You Begin
- You’re an admin of the organisation. Operators can’t make payments.
- You have a credit / debit card or your team’s payment method ready.
- You know how many credits you want to buy. Minimum is 1,000 credits per purchase. See Photo Processing Costs for sizing.
Open the Top-Up Flow
There are two ways to open the purchase flow — they go to the same place.From Credits → Purchase Credits
Sidebar → Credits → Purchase Credits button on the Available Credits card.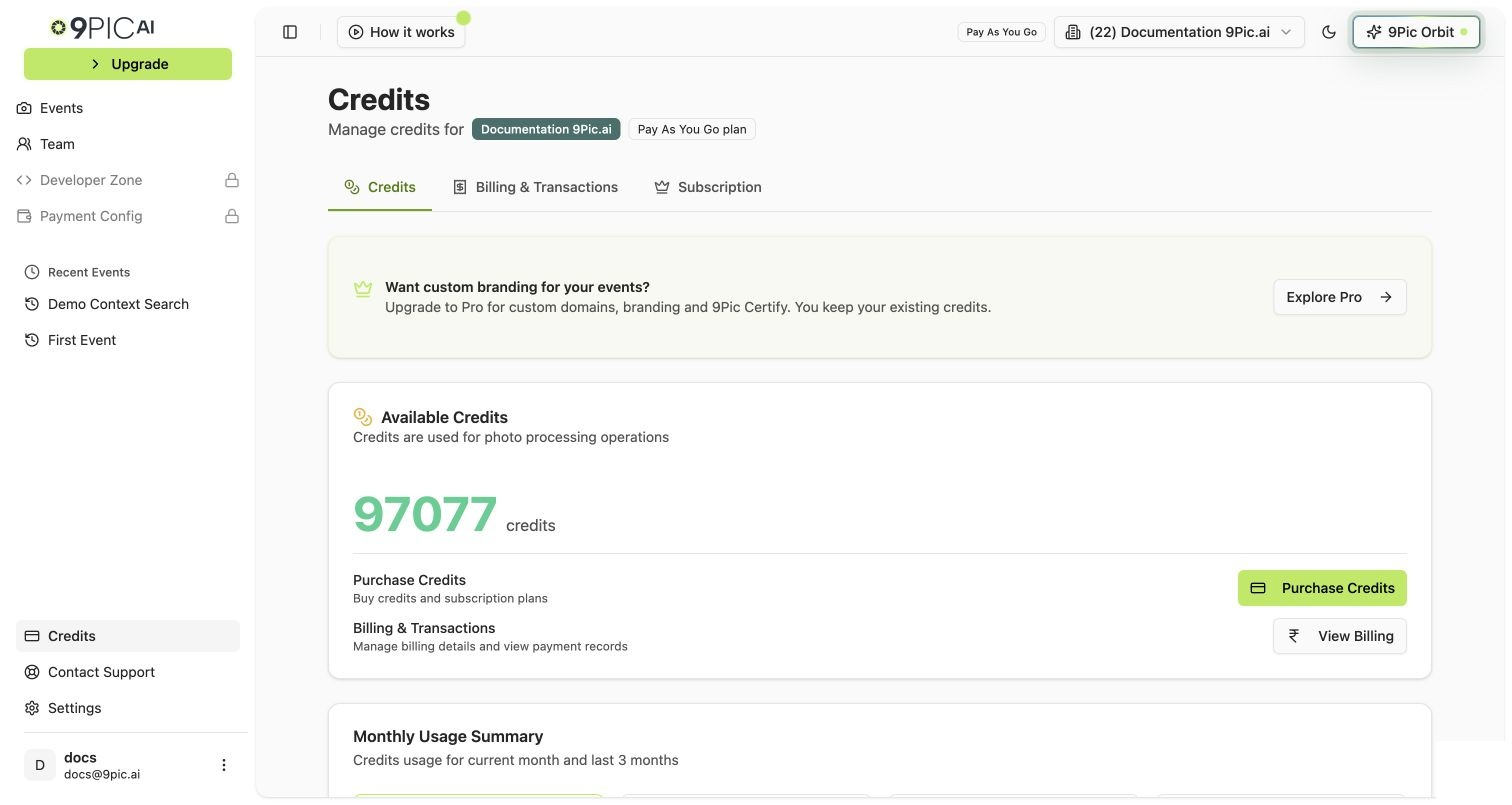
From the sidebar Upgrade button
The sidebar Upgrade button also lands on the Purchase Credits flow. (It’s labelled “Upgrade” because the same flow can also be used to move to Pro — see Upgrade to Pro.)
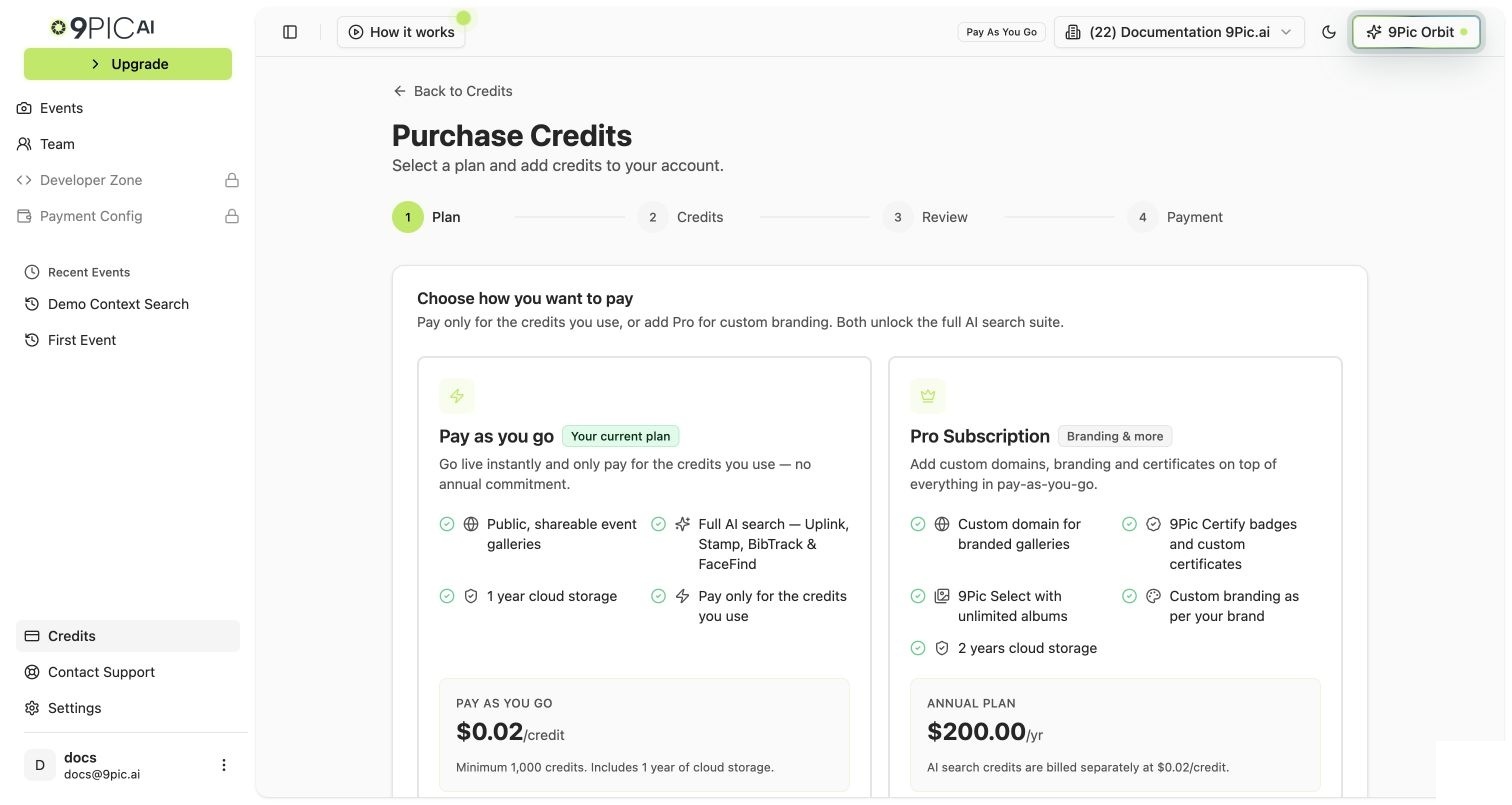
Step 1 — Plan
Pay As You Go customers see four options on the Plan step:| Option | What it does |
|---|---|
| Pro Subscription | Switches your account to Pro (annual subscription). See Upgrade to Pro. |
| Pay as you go | The Pay As You Go top-up path. The card is marked Your current plan for PAYG organisations. Keep this selected for a routine credit purchase. |
| Custom Payment | Records a payment without adding credits — used for one-off invoices and manual reconciliation. Skip unless support asked you to use it. |
| Enterprise | Disabled card; clicking it opens 9pic.ai/contact to talk to our team. |
Step 2 — Credits
Enter the number of credits you want to buy. Minimum is 1,000. The order summary on the side updates live as you change the number.| Event size you expect | Recommended top-up |
|---|---|
| 500–1,000 photos | 1,000 credits |
| 1,000–3,000 photos | 3,000 credits |
| 3,000–10,000 photos | 10,000 credits |
| 10,000+ photos | Top up for the event size, and read When to Upgrade — Pro may be cheaper for you. |
Step 3 — Review
Review the order summary. You’ll see:- The plan (the Pay as you go top-up path in this flow).
- The credit quantity you entered.
- The currency — based on your organisation’s region.
- Any applicable taxes — shown automatically based on your billing region.
- The grand total to be charged.
Step 4 — Payment
Click the payment button
The button label depends on your billing currency and region — for example Pay with Razorpay or Pay with PayGlocal. Click it to launch the secure gateway window.
Complete checkout in the gateway window
Enter card details in the payment gateway. 9Pic does not see or store your card information — the gateway handles it directly.
Wait for verification
After payment, 9Pic verifies the transaction. This usually takes a few seconds. The dashboard shows a spinner.
If you need an invoice, open Credits → Billing & Transactions after the purchase. See Invoices & Transactions.
If Payment Fails
| Symptom | What to do |
|---|---|
| Card declined | Try a different card or contact your bank. The order is not retried automatically. |
| You closed the window before paying | The order is marked Abandoned. Just start the flow again — no charge. |
| Charged but credits didn’t update | Rare but recoverable. Open Credits → Billing & Transactions, find the row, and click Recheck. The dashboard re-queries the gateway and finalises the transaction. If still stuck, take a screenshot of the gateway confirmation and email support@9pic.ai. |
| Gateway error mid-flow | Close the gateway window, refresh the dashboard, and start the flow again. Any partial order will be marked Abandoned. |
Common Questions
Why is the minimum 1,000 credits?
Why is the minimum 1,000 credits?
Per-purchase processing overhead (gateway fees, accounting) makes very small purchases unproductive. 1,000 credits is the minimum the dashboard accepts — anything lower is rejected by the API.
Are bigger top-ups discounted?
Are bigger top-ups discounted?
No. Per-credit cost is constant. Buy what your next event needs, plus a small buffer. There’s no incentive to stockpile.
Do credits expire?
Do credits expire?
No. Pay As You Go credits sit in your balance indefinitely.
Can I get a refund for unused credits?
Can I get a refund for unused credits?
Refund eligibility is governed by 9Pic’s Refund Policy, which you accept at every purchase. For specific situations, email support@9pic.ai.
The dashboard shows my payment as Pending. What now?
The dashboard shows my payment as Pending. What now?
Open Credits → Billing & Transactions, find the pending row, and click Recheck. The dashboard re-queries the payment gateway and finalises (or marks failed) accordingly. If it stays Pending after Recheck, email support with your gateway confirmation screenshot.
Why does the same flow show a Pro Subscription option?
Why does the same flow show a Pro Subscription option?
The Purchase Credits flow is shared between Pay As You Go top-ups and the Pro upgrade — same wizard, different first-step pick. Pay as you go stays on Pay As You Go. Pro Subscription moves the account to Pro. See Upgrade to Pro.
Next Steps
Invoices & Transactions
Download invoices and recheck stuck payments.
Manage Credits
The Credits dashboard.
Avoid Credit Foot-Guns
Don’t burn the credits you just bought.
Upgrade to Pro
Same wizard, switch to the annual plan.