

Overview
The Photo Watermark tab (formerly Branding) holds the Watermark card, which shows a preview, a status badge and its main action. Events that store original photos also get copyright-text watermarks and settings for what buyers see before paying. Set your watermark up before you process photos, because watermarks are applied during processing.The Event Banner and the participant Landing Page moved to Event Config → Event Page. See Event Banner and Landing Page.
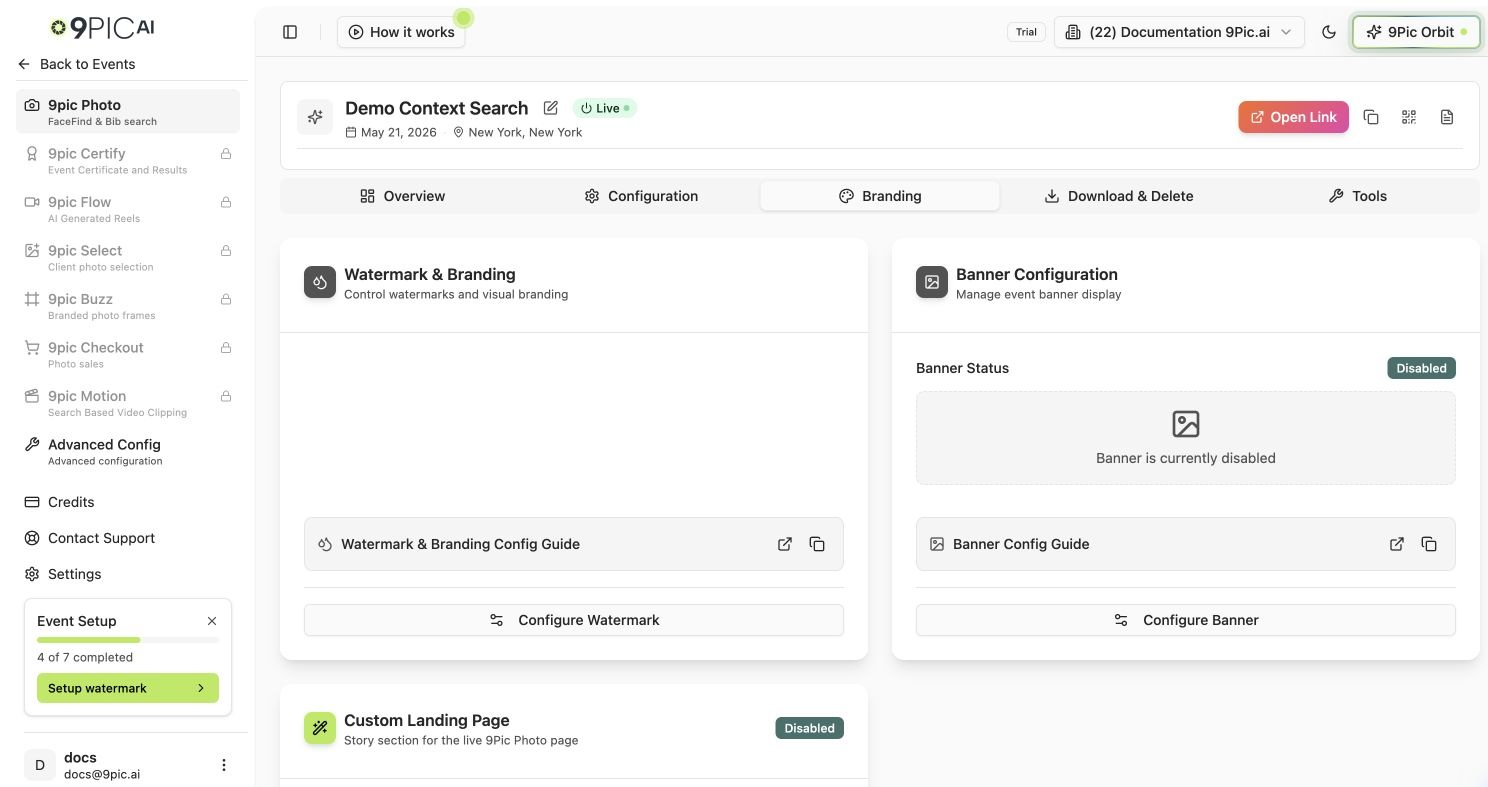
Photo Watermark tab
Watermark
The Watermark card shows your watermarks on a landscape photo, with one line per watermark (type, position, size and opacity, and whether portrait photos use their own settings). The badge shows how many are added, or Not set up. Click Edit watermark (or Add watermark before you have one) to open the Watermark page. The settings are on the left and a live preview is on the right (below the settings on a phone).1
Choose what the watermark should do
Under 1. What should the watermark do?, pick Show my brand for your logo or a sponsor strip, or Protect photos for sale for copyright text repeated across each photo. Protect is available when the event stores original photos, whether or not Checkout is on. Without original photos this step is skipped and the editor opens straight on your watermark cards. An event that already has saved copyright text can always choose it, so you can switch to Show my brand and back before saving.
2
3
Check the preview
The Preview shows your watermark on a landscape and a portrait photo side by side. If you have generated a preview on the Photo Overview tab, Your photos shows those event photos (use Next photo to step through them). Light sample and Dark sample use a sample race photo so you can check the watermark stays readable on bright and dark shots. Without event photos, only the samples are shown, with a reminder to generate a preview from the Overview tab first.
4
Save
Once you change something, a bar appears at the bottom with You have unsaved changes. Click Save watermark, or Discard to put the saved watermark back. Saving takes you back to the Photo overview. Saving a changed watermark clears the event’s preview photos, so generate a new preview to check the result on your photos.
Copyright text is always the event’s only watermark. If you switch between Show my brand and Protect photos for sale, the editor keeps your other settings until you save, so you can switch back. Saving with copyright text replaces your logo and strip watermarks, and saving with a logo or strip replaces your copyright text.
Logos and sponsor strips
Under 2. Your watermark, each watermark is a numbered card. Click Add another watermark to add more, up to four (for example a sponsor strip and a logo). Every watermark is added to every photo, and higher numbers sit on top. Only one card is open at a time; click Edit on another row to switch, or Remove to delete the open card when you have more than one. With two or more watermarks, numbered badges on the preview match the cards, and you can click a watermark in the preview to edit it.
Open More settings for less common options:
- Vertical margin and Horizontal margin: the space from the top or bottom edge (share of photo height) and from the side (share of photo width). On a strip the horizontal margin leaves space on each side and the strip narrows to fit. Only the margins that move the watermark are shown; a logo in the centre has none.
- Different position and size on portrait photos: gives tall photos their own position and width or size. Everything else follows the landscape settings.
- Use a different image on portrait photos: adds a Portrait image field (the main image becomes Landscape image). Otherwise the same image is used on tall and wide photos.
Choosing the image
An empty image field offers three ways to add your artwork:- Upload a PNG: PNG files only, up to 300 KB.
- Use one you’ve used before: your Organisation logo from Settings → Branding, images already saved in this event’s watermark (Saved watermark 1, 2 …) and images you replaced while editing (Replaced earlier). It only appears when there is something to offer, and never lists images from other events.
- Paste a 9Pic image link: only images already stored with 9Pic (links starting
https://photos.9pic.ai/). A link from any other website shows Links from other websites can’t be used, because for security, and so your watermark doesn’t break later, the image has to be stored with 9Pic. Upload the image or pick one you’ve used before instead.
An older watermark image stored on another website keeps working, but the editor warns that it can’t be checked and could stop working. Upload it again to keep it safe.
Recommendations
After the image loads, 9Pic checks it against this watermark’s type and Width or Size, on your event’s photos (taken from the preview you generated on the Overview tab) or, if there are none yet, a typical 4,000 px wide photo.
Checks that pass are folded under “N look good”. Make background transparent and Trim empty edges upload a fixed copy of your image, which is used once you click Save watermark.
Copyright text for photo sales
Choosing Protect photos for sale opens Create text overlay. Type up to 80 characters. Latin, Cyrillic, Greek, Arabic, Hebrew, Thai, Japanese, Korean, Chinese and the main Indian scripts are supported; if the text has a character outside those, Generate names it and creates nothing until you remove or replace it. Turn Add © prefix on to put © before your text, then choose the direction, size, text style and density and click Generate. 9Pic creates a landscape and a portrait version. The dialog opens on Recommended, which sets © on, diagonal, medium, Alternating and Dense, and explains why; choose Custom to change any setting. Every overlay 9Pic generates shifts and turns each stamp slightly and inks it in varied colours over a stronger lattice, so AI tools can’t key out one ink colour or one repeating pattern. Each overlay gets its own random variation, so the dialog preview shows the look with a sample one. Under 2. Your copyright text you can then:- Click Change text and style to reopen the dialog. Your chosen opacity and size are kept.
- Copyright text generated before 9Pic made every overlay varied keeps the earlier, plain look, and the editor doesn’t show which kind you have. To switch, click Change text and style, then Generate (the same text and settings are fine), click Save watermark, then run Re-Process Watermark on the Photo overview. Photos already processed keep the old text until you re-process them.
- Adjust Opacity and Size. The text always stays centred.
- Under More settings, turn on Different opacity and size on portrait photos, or use Open landscape image and Open portrait image to view the generated files.
What buyers see before paying
On events that store original photos (Store Original Photos on), the watermark editor shows an Advanced: what buyers see before paying panel below the live preview, whether or not Checkout is turned on. It has two switches. Each has a help button explaining when to turn it on. They control what is written for photos processed from now on. Buyers always receive the stored original after payment, whatever you choose here, and the participant gallery keeps showing watermarked photos.
The switches save with Save watermark. Changing only the switches does not clear your watermark previews.
Photo-sale events that never saved these switches keep their earlier output (full-size large photo on, small copies off) until you change the switches and re-process.
Recommended Flow
1
Configure your watermark first
Choose a logo, sponsor strip or copyright text and check it on both the landscape and portrait preview, so every processed photo carries the right branding.
2
Generate a preview
From Photo Overview, use Generate Preview in Step 1 to verify placement.
3
Process only after the preview looks right
Run Process Photos once you’re happy with the watermark preview.
Common Questions
Why don't I see my watermark on processed photos?
Why don't I see my watermark on processed photos?
Generate a preview from the Overview tab first, then process. Watermarks only appear on photos processed after the watermark was configured.
Do I need separate portrait and landscape watermarks?
Do I need separate portrait and landscape watermarks?
No. One image is used on both by default. If it does not fit tall photos, open More settings on that watermark and turn on Use a different image on portrait photos, or Different position and size on portrait photos to move or resize it on portrait photos only.
Why don't I see Protect photos for sale?
Why don't I see Protect photos for sale?
The event doesn’t store original photos, so the editor goes straight to your logo or strip. Events that already have saved copyright text can always choose it. Store original photos can only be turned on when the event is created; email support@9pic.ai about an existing event.
Why don't I see what buyers see before paying?
Why don't I see what buyers see before paying?
The Advanced: what buyers see before paying panel only appears when the event stores original photos, whether or not Checkout is on.
Why do large photos look small on my photo-sale event?
Why do large photos look small on my photo-sale event?
Show the large photo at full size is off, so the large photo is the 300px watermarked preview. Turn it on under Advanced: what buyers see before paying in the watermark editor, click Save watermark, and re-process the photos you want at full resolution.
Where do I get the unwatermarked thumbnail?
Where do I get the unwatermarked thumbnail?
Only through the external API: with Create small copies without a watermark on, each photo object carries a
thumbnail_original_url once the photo is processed. The gallery never shows it.Next Steps
Photo Overview
Generate watermark previews and process photos.
Configuration
Search methods, display options, and downloads.
Event Config
Event banner, landing page, call to action and language.