

Overview
Event details is the workhorse screen for every event. It hosts the product navigation for your event, and each product exposes its own set of tabs. This page explains the layout, the navigation pattern, the plan-gating, and the URL conventions. Deep references are available for 9Pic Photo, 9Pic Certify, 9Pic Flow, 9Pic Select, 9Pic Buzz, 9Pic Motion, and the other event tools.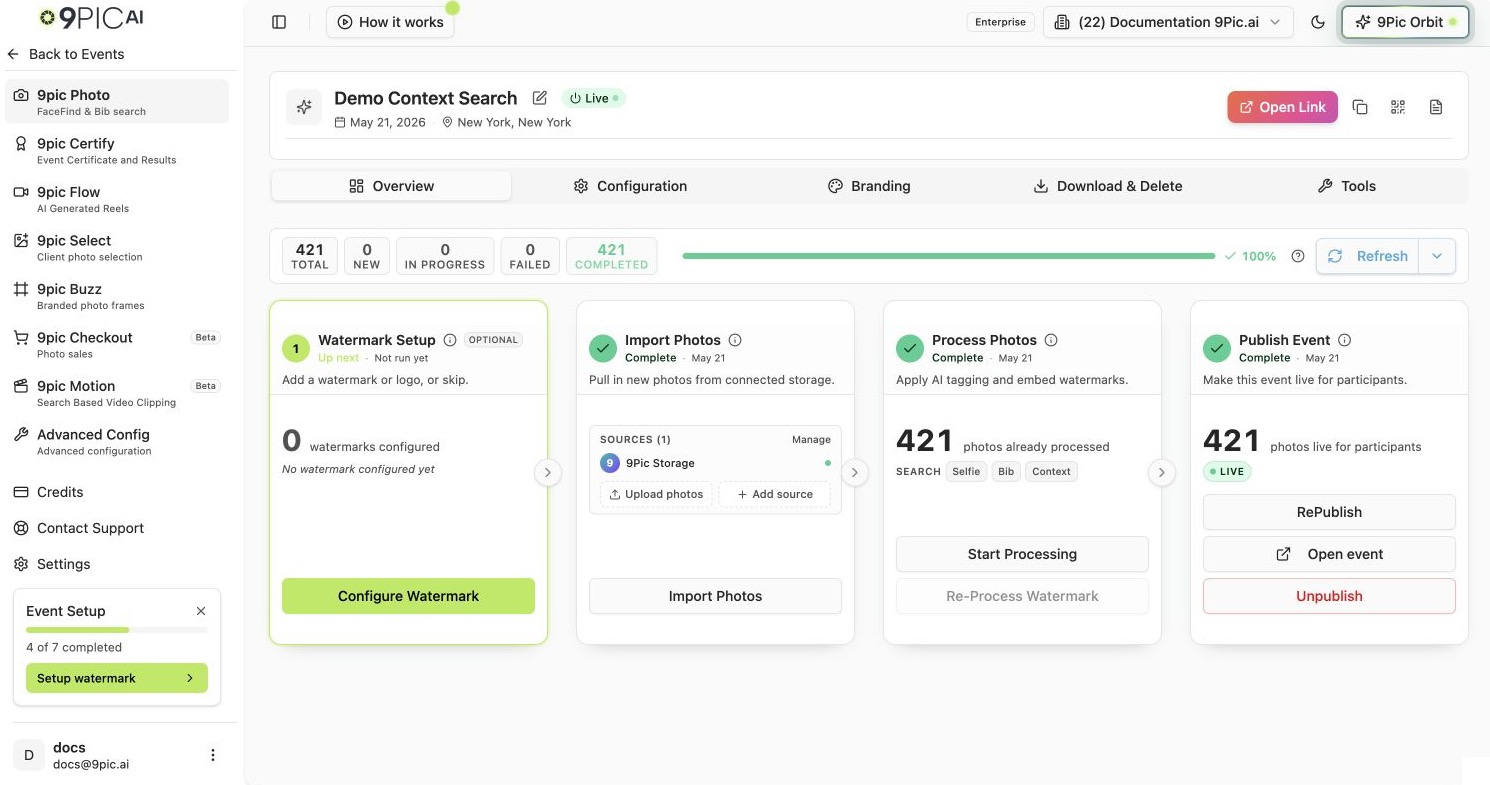
Event details desktop layout
Opening an Event
1
From the Events list
Click any row, or the Configure button on the right of a row. See Events list.
2
From the sidebar
Click any Recent Events entry in the dashboard sidebar.
3
From a direct URL
Bookmark or share
https://admin.9pic.ai/event-memories/{'<EVENT_ID>'}/details.Layout
Event details has five regions:
Use Events in the navbar to return to the event list. The event name opens
its Photo overview. Separate pages include their owning tab in the trail: for
example, Events → event name → Photo Config → Bib patterns. Select Photo
Config to return directly to Photo Configuration. A separate Bib Config level
is not added, and the page no longer needs a Back to Configuration button.
Watermark editors return through the Photo or Motion Watermark tab, and the
landing page builder returns through Event Config → Event Page; order
details return through Checkout Transactions.
Long event names truncate with an ellipsis and show their full name on hover.
On narrower headers, open Show parent pages to select a collapsed parent.
Breadcrumbs only navigate; Save and Cancel keep their existing behavior, and
pages with unsaved-change checks still ask before leaving.
The Nine Products
Every event exposes the same nine products in the secondary navigation. Availability depends on your plan. Products you cannot use on your current plan are shown in muted text. Clicking one tells you which plan unlocks it.The creative tools (Certify, Flow, Select, Buzz, Motion) unlock on the Pro plan, and Checkout unlocks on Business. On Trial you can try Certify, Buzz and Checkout (in test mode); Flow, Select and Motion show a lock that says they unlock on Pro. If a product you expect is still locked after upgrading, email support@9pic.ai to have it switched on for your organisation.
Locked products stay in the list in muted text. Clicking one shows a message naming the plan that unlocks it, and you stay on your current page. On desktop, hovering a locked product in the sidebar shows the same message. If you open a locked product from a link, you see a panel with the plan that includes it and a button to upgrade. A product you set up for this event on an earlier plan keeps its settings: the panel says the setup is saved and works again on that plan.
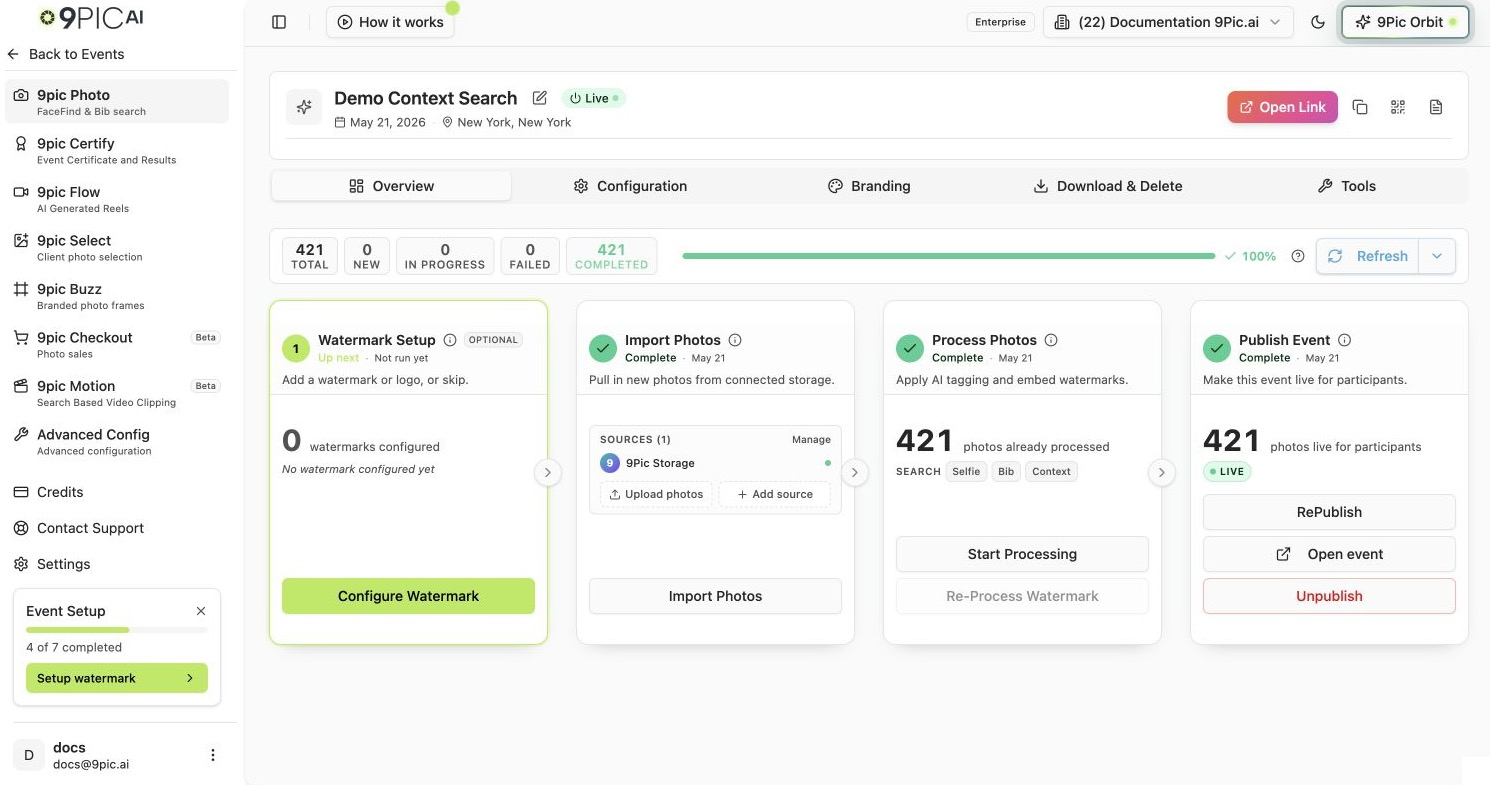
Event product sidebar
How Tabs Work Per Product
Each product has its own tab set. Switching products takes you to that product’s default tab automatically — usually Overview.
The Photo product’s Tools tab is a launcher for two AI tools — Manual Tagging and AI Image Analysis — each on its own page.
Switching tabs updates the URL but does not change which product is selected. Switching products picks the product’s default tab.
URL Patterns You Can Share
Event details exposes its product and tab state in the URL search params. You can bookmark a deep link straight to any product/tab combination.The Event Header
The header sits above the tab bar and stays the same as you switch tabs. It exposes the actions you most often need from any tab:Common Questions
Why are some products greyed out?
Why are some products greyed out?
Those products are not available on your current plan. Click one to see a message telling you which plan unlocks it. Visit Credits & Billing in the sidebar to upgrade.
I see Beta next to a product name. Should I use it?
I see Beta next to a product name. Should I use it?
Yes — Beta products are usable in production, but expect occasional UI changes or feature tweaks. If a Beta product breaks an event, email support@9pic.ai.
A product I expect is still locked after upgrading.
A product I expect is still locked after upgrading.
The creative tools (Certify, Flow, Select, Buzz, Motion) unlock on Pro, and Checkout on Business. If one is still locked after your plan changes, email support@9pic.ai to have it switched on for your organisation.
How do I rename or change the event date after creation?
How do I rename or change the event date after creation?
Click Edit Event Info in the event header. A modal opens with the same name, date, and location fields you used when creating the event.
Next Steps
9Pic Photo overview
Deep dive into sources, sync, and processing for the core Photo product.
9Pic Certify
Set up certificate sources, templates, participant records, requirements, and publishing.
9Pic Flow
Create AI-generated highlight reels and prepare the right event inputs.
9Pic Select
Let clients and teammates review and choose the best event photos.
9Pic Buzz
Add branded frames and overlays to participant photos.
9Pic Motion
Help participants find their moments in event video footage.
Events list
Back to the list of all your events.
Create an event
Field-by-field reference for the new event form.