> ## Documentation Index
> Fetch the complete documentation index at: https://docs.9pic.ai/llms.txt
> Use this file to discover all available pages before exploring further.
# Photo Branding
> Watermarks, the event banner, and the custom landing page for your photo gallery.
## Overview
The **Branding** tab controls how your event looks to participants. It has three cards: **Watermark & Branding**, **Banner Configuration**, and **Custom Landing Page**. Set branding up *before* you process photos, because watermarks are burned in during processing.
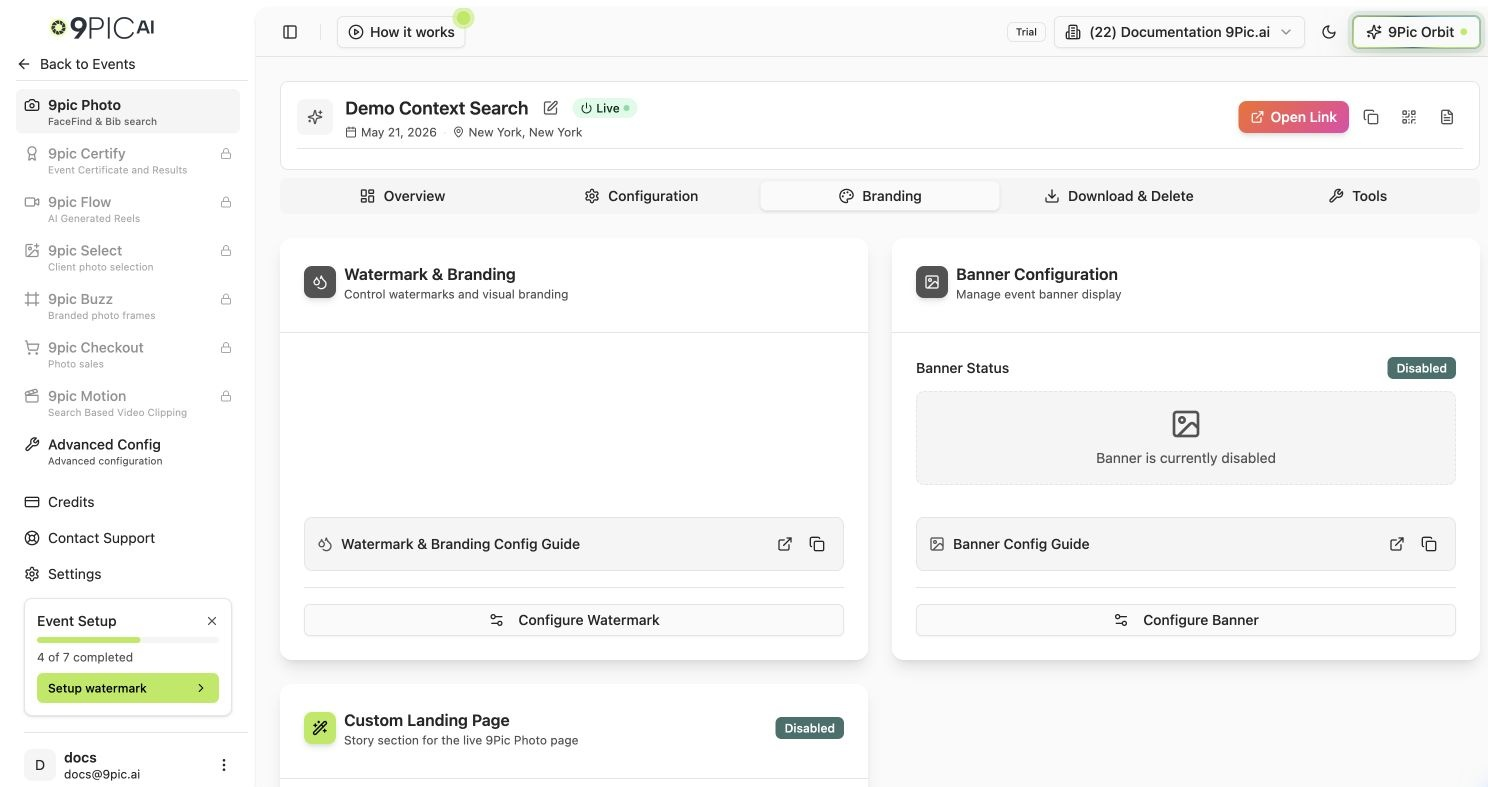 ## Watermark & Branding
The watermark card summarises how many watermarks are configured and for which orientations (portrait, landscape, or both). Click **Configure Watermark** to open the watermark editor, where you can:
* Upload separate art for **portrait** and **landscape** photos.
* Position, size, and set the transparency of the mark.
* Preview the result before processing.
Watermarks are embedded into photos during **processing**. If you change a watermark after photos are processed, you must re-process those photos for the new mark to appear.
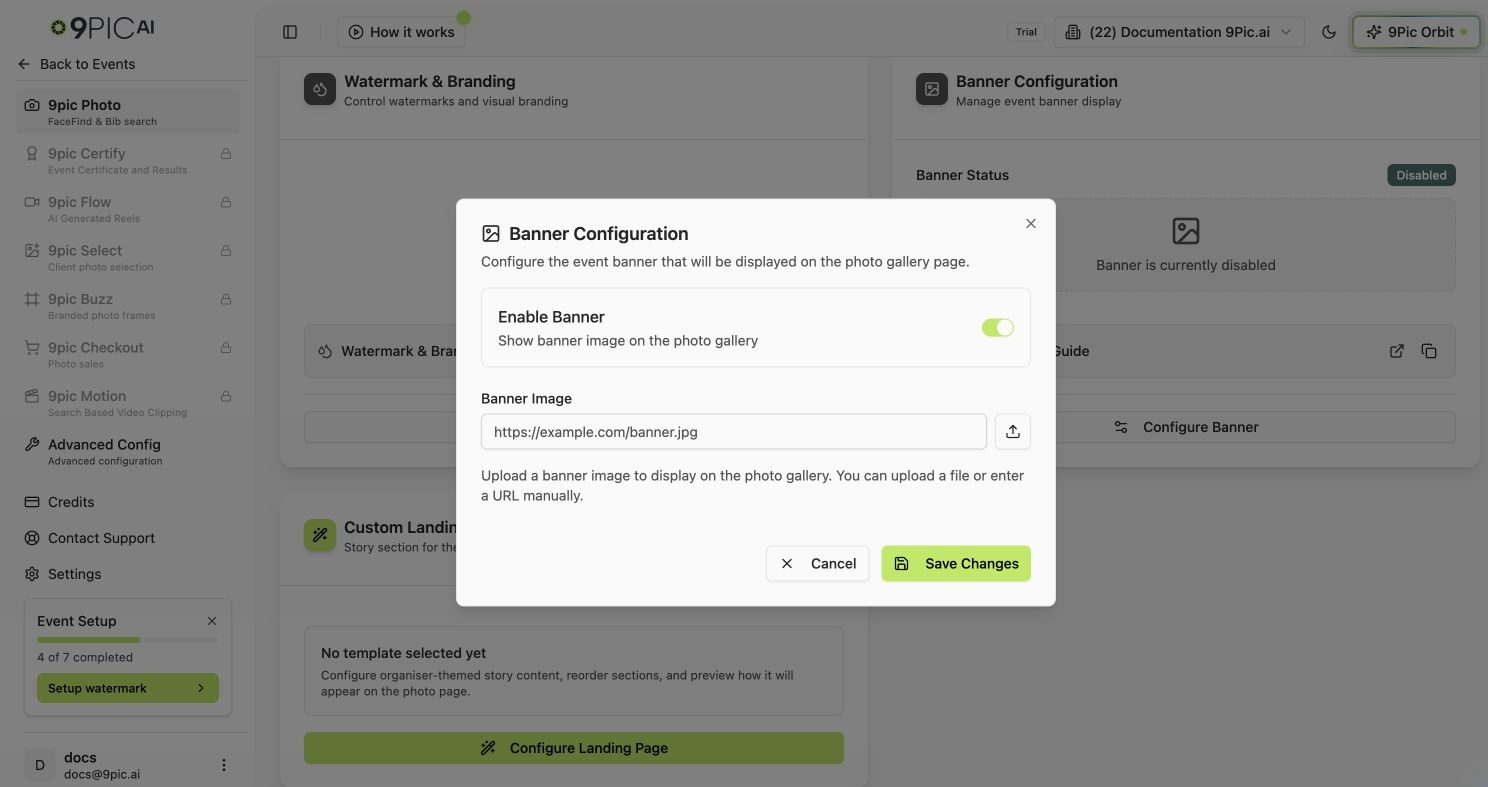
## Banner Configuration
Click **Configure Banner** to open the banner modal and upload a hero image for the public event page. The banner can be enabled or disabled per event without deleting the image, so you can reuse it later.
## Watermark & Branding
The watermark card summarises how many watermarks are configured and for which orientations (portrait, landscape, or both). Click **Configure Watermark** to open the watermark editor, where you can:
* Upload separate art for **portrait** and **landscape** photos.
* Position, size, and set the transparency of the mark.
* Preview the result before processing.
Watermarks are embedded into photos during **processing**. If you change a watermark after photos are processed, you must re-process those photos for the new mark to appear.
## Banner Configuration
Click **Configure Banner** to open the banner modal and upload a hero image for the public event page. The banner can be enabled or disabled per event without deleting the image, so you can reuse it later.
 ## Custom Landing Page
The **Custom Landing Page** card adds an organiser-themed story section to the live 9Pic Photo page. Its badge shows **Enabled** or **Disabled**, and the body shows the selected template (or "No template selected yet"). Click **Configure Landing Page** to choose a template, add story content, reorder sections, and preview how it appears to participants.
## Recommended Flow
Set up portrait and landscape art so every processed photo carries the right branding.
From [Photo Overview](/dashboard-guide/photos/overview), use **Generate Preview** in Step 1 to verify placement.
Run **Process Photos** once you're happy with the watermark preview.
## Common Questions
Generate a preview from the Overview tab first, then process. Watermarks only appear on photos processed *after* the watermark was configured.
Yes. Toggle the banner off in the modal and the image is kept for later use.
You can upload both. If you provide both, 9Pic applies the right one to each photo based on its orientation.
## Next Steps
Generate watermark previews and process photos.
Search methods, display options, and downloads.
## Custom Landing Page
The **Custom Landing Page** card adds an organiser-themed story section to the live 9Pic Photo page. Its badge shows **Enabled** or **Disabled**, and the body shows the selected template (or "No template selected yet"). Click **Configure Landing Page** to choose a template, add story content, reorder sections, and preview how it appears to participants.
## Recommended Flow
Set up portrait and landscape art so every processed photo carries the right branding.
From [Photo Overview](/dashboard-guide/photos/overview), use **Generate Preview** in Step 1 to verify placement.
Run **Process Photos** once you're happy with the watermark preview.
## Common Questions
Generate a preview from the Overview tab first, then process. Watermarks only appear on photos processed *after* the watermark was configured.
Yes. Toggle the banner off in the modal and the image is kept for later use.
You can upload both. If you provide both, 9Pic applies the right one to each photo based on its orientation.
## Next Steps
Generate watermark previews and process photos.
Search methods, display options, and downloads.