> ## Documentation Index
> Fetch the complete documentation index at: https://docs.9pic.ai/llms.txt
> Use this file to discover all available pages before exploring further.
# Xendit Setup
> Add Xendit credentials to 9Pic Checkout and prepare an event for test or live payments.
9Pic Checkout is a **Beta**, **Enterprise plan** feature. Only team admins can add or change a Xendit configuration.
## Overview
Xendit collects payments for 9Pic Checkout across several Southeast Asian currencies. Add one Xendit configuration for your organisation, then assign it to the event that will sell packages.
You need a **secret key** from the Xendit Dashboard. Xendit issues a development secret key while you test and a separate production secret key for real payments.
9Pic does not automatically detect whether a Xendit secret key is a development or production key. Double-check which key you are pasting in before you publish an event for real buyers.
## Before You Start
| Requirement | Why it matters |
| ----------------------------------- | ------------------------------------------------------------------------------------------------------------------------------------------------------------------------------------------------ |
| **Xendit merchant access** | You need permission to view the API Keys page in the Xendit Dashboard. |
| **Correct key for the environment** | Use a development secret key for setup checks and a production secret key for public checkout. 9Pic does not block a development key from being used in production, so confirm the key yourself. |
| **A team admin account** | Only team admins can open and manage Payment Configuration. |
| **An Enterprise organisation** | Payment Configuration and 9Pic Checkout are available on the Enterprise plan. |
| **Supported currencies** | Events that use Xendit can only sell packages priced in IDR, PHP, MYR, THB, or VND. |
Do not share the secret key in email, chat, task tickets, screenshots, frontend code, or a public repository. If you think it has been exposed, create a new key in Xendit and update the configuration in 9Pic.
## Get Your Xendit Secret Key
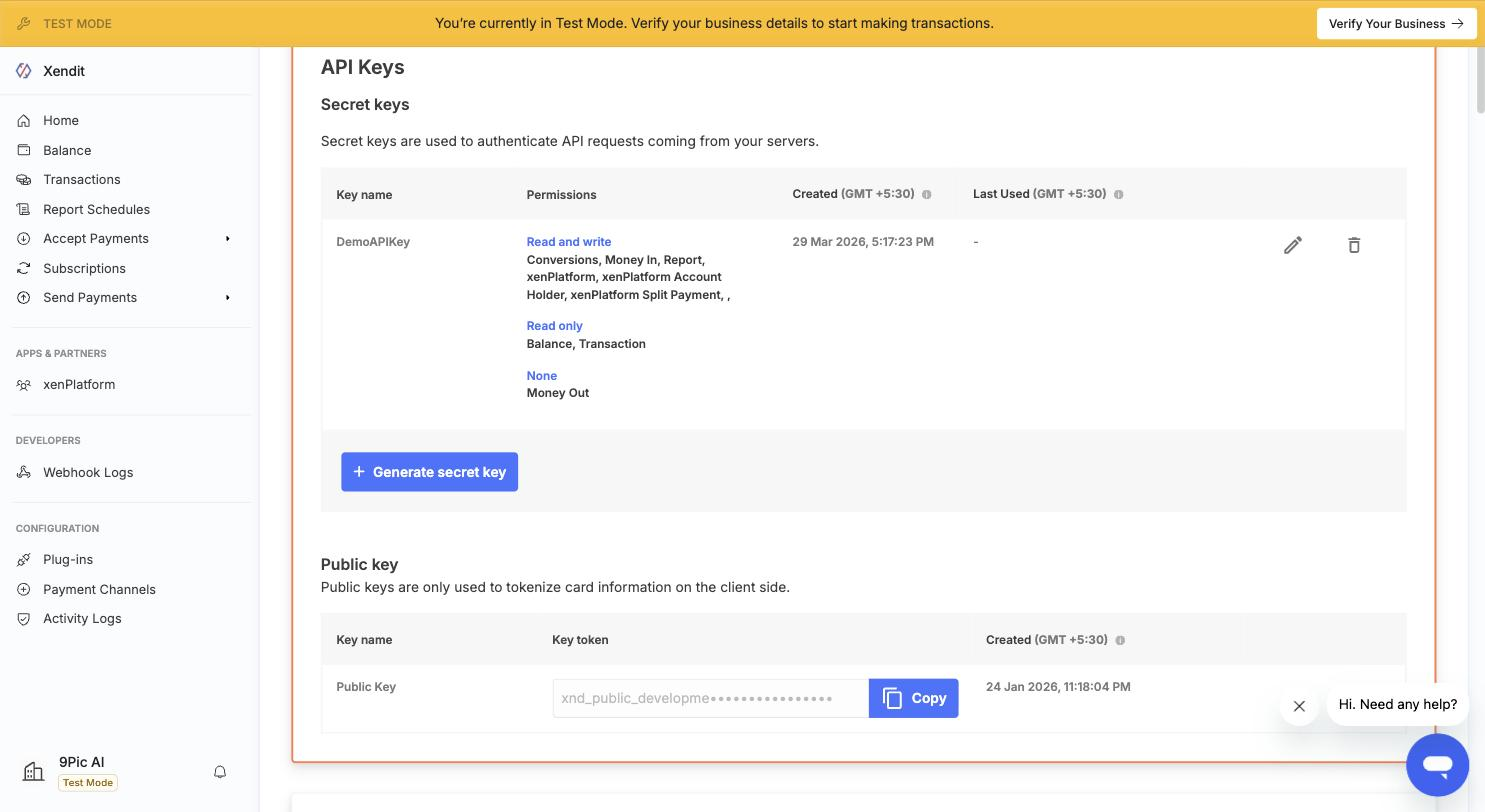
Sign in to the Xendit Dashboard and open the **API Keys** page.
Copy the **secret key** for the environment you are working in. Xendit's own convention starts development keys with `xnd_development_` and production keys with `xnd_production_`.
Keep the key in your organisation's approved password manager until you add it to 9Pic. Do not paste it into a buyer-facing website or app.
Need help finding the keys in Xendit? Check the Xendit Dashboard's API Keys page directly, or contact the Xendit team that provisioned your merchant account.
## Add Xendit to 9Pic
In the dashboard sidebar, select **Payment Config**.
In **Payment Gateway Configurations**, click **Add Gateway**, then select **Xendit**.
Enter an optional **Label** that makes the configuration easy to recognise, such as `Xendit Test` or `Xendit Live Indonesia`.
**Account ID** is optional for Xendit. Use it only if your team wants a reminder of which Xendit account the key belongs to.
Paste the key into **Xendit Secret Key**. This required value is stored as a protected credential for your organisation.
Click **Create Gateway**. The new Xendit configuration appears in the organisation's gateway list.
## Assign Xendit to an Event
Open the event, then open its **Checkout** configuration.
In the **Payment gateway** card, select **Assign** (or **Edit** if a gateway is already assigned), choose the Xendit configuration, and save.
Create or update Checkout packages in **IDR**, **PHP**, **MYR**, **THB**, or **VND**. Other currencies cannot be used with Xendit.
Publish the packages and run a complete buyer journey with a development-key configuration before you switch the event to a production key.
Xendit does not offer a **Pass on fees** option in 9Pic Checkout. The listed package price is always the amount charged.
Replacing the assigned gateway while Checkout is live pauses Checkout first. Confirm the new configuration and package currency before you publish it again.
## Verify the Setup
| Check | What to confirm |
| ------------------------- | ----------------------------------------------------------------------------------------------------------------------------------------- |
| **Correct key** | The pasted secret key matches the environment you intend — development for testing, production for public checkout. |
| **Payment page opens** | A buyer can continue from 9Pic to the Xendit hosted payment page. |
| **Payment completes** | A successful test payment returns to 9Pic and marks the order paid. |
| **Currency is supported** | Package prices and the Xendit payment page both show IDR, PHP, MYR, THB, or VND. |
| **Buyer methods appear** | Payment methods shown to the buyer match what is enabled on your Xendit account; 9Pic does not restrict or select methods on your behalf. |
| **Cancellation works** | Cancelling returns the buyer to 9Pic without marking the order paid. |
## Troubleshooting
Edit the Xendit configuration in **Payment Config** and confirm that **Xendit Secret Key** has a value. Then assign that configuration on the event's **Payment gateway** card.
9Pic does not block a development secret key from being used in production for Xendit. Review the configuration's key before publishing packages for a public event, and replace it with a production key when you are ready to accept real payments.
Events assigned to Xendit can only sell IDR, PHP, MYR, THB, or VND packages. Choose one of those currencies, or assign a gateway that supports the currency you need.
9Pic does not send a fixed list of payment methods to Xendit. The buyer sees whatever payment methods are enabled on your Xendit account. Enable the method in Xendit, then retry a test purchase.
Xendit does not support passing provider fees on to buyers in 9Pic Checkout. The listed package price is always the amount charged.
## Next Steps
Manage the payment gateways saved for your organisation.
Assign a gateway, publish packages, and enable Checkout for an event.