> ## Documentation Index
> Fetch the complete documentation index at: https://docs.9pic.ai/llms.txt
> Use this file to discover all available pages before exploring further.
# Stripe Key Setup
> Create a Stripe restricted key for 9Pic Checkout and add it to Payment Configuration.
9Pic Checkout is a **Beta**, **Enterprise plan** feature. Create Stripe keys only in the Stripe account and mode you intend to use for the event.
## Overview
A Stripe restricted key lets 9Pic Checkout use only the Stripe permissions it needs instead of a full-access secret key. Create the key in Stripe first, then paste it into **Payment Config -> Add Gateway -> Stripe** in 9Pic.
Use the downloadable [Stripe Restricted API Key Setup Guide](https://photos.9pic.ai/assets/common/Stripe%20Restricted%20API%20Key%20Setup%20Guide.pdf) as your external checklist while following this dashboard guide.
 ## Before You Start
Make sure you have:
| Requirement | Why it matters |
| -------------------------- | -------------------------------------------------------------------------------------------------------------------------------- |
| **Stripe admin access** | You need permission to create restricted keys. |
| **Correct Stripe account** | Keys belong to one Stripe account. Check the account switcher before creating one. |
| **Correct mode** | Use test mode for setup checks and live mode only when you are ready to accept real payments. |
| **A secure storage plan** | Stripe shows the new key value once. Store it in your team's approved password manager or secret store before adding it to 9Pic. |
Never place restricted keys in a public repository, frontend/mobile app, browser script, email, or chat message. Treat them like passwords.
## Create the Restricted Key in Stripe
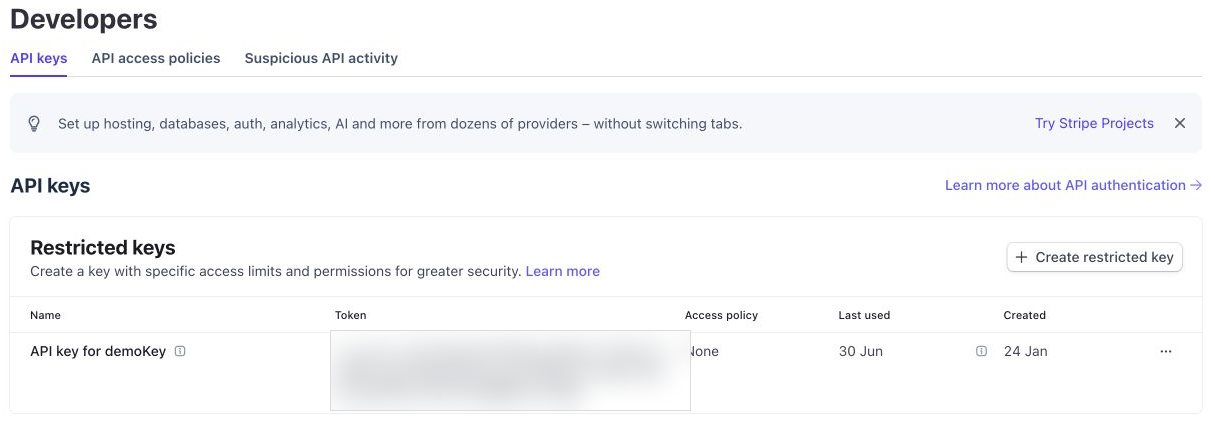
Sign in to Stripe and open **Developers -> API keys**. In the **Restricted keys** section, click **Create restricted key**.
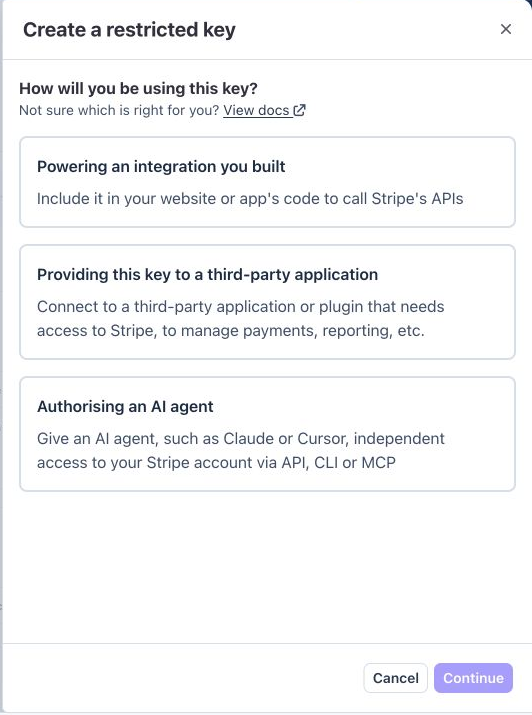
When Stripe asks how you will use the key, select **Powering an integration you built**, then click **Continue**.
## Before You Start
Make sure you have:
| Requirement | Why it matters |
| -------------------------- | -------------------------------------------------------------------------------------------------------------------------------- |
| **Stripe admin access** | You need permission to create restricted keys. |
| **Correct Stripe account** | Keys belong to one Stripe account. Check the account switcher before creating one. |
| **Correct mode** | Use test mode for setup checks and live mode only when you are ready to accept real payments. |
| **A secure storage plan** | Stripe shows the new key value once. Store it in your team's approved password manager or secret store before adding it to 9Pic. |
Never place restricted keys in a public repository, frontend/mobile app, browser script, email, or chat message. Treat them like passwords.
## Create the Restricted Key in Stripe
Sign in to Stripe and open **Developers -> API keys**. In the **Restricted keys** section, click **Create restricted key**.
When Stripe asks how you will use the key, select **Powering an integration you built**, then click **Continue**.
 Select **Choose your own** so you can grant only the permissions 9Pic Checkout needs.
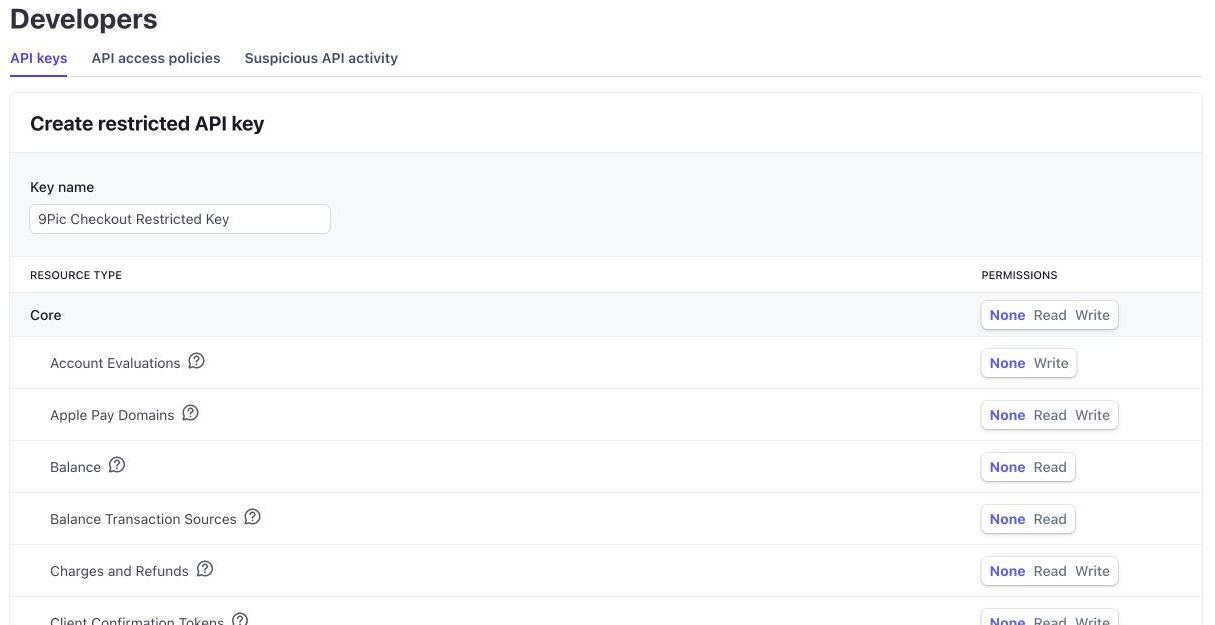
Use a clear name such as `9Pic Checkout Restricted Key`. If you maintain separate test and live keys, include that in the name.
Select **Choose your own** so you can grant only the permissions 9Pic Checkout needs.
Use a clear name such as `9Pic Checkout Restricted Key`. If you maintain separate test and live keys, include that in the name.
 ## Required Stripe Permissions
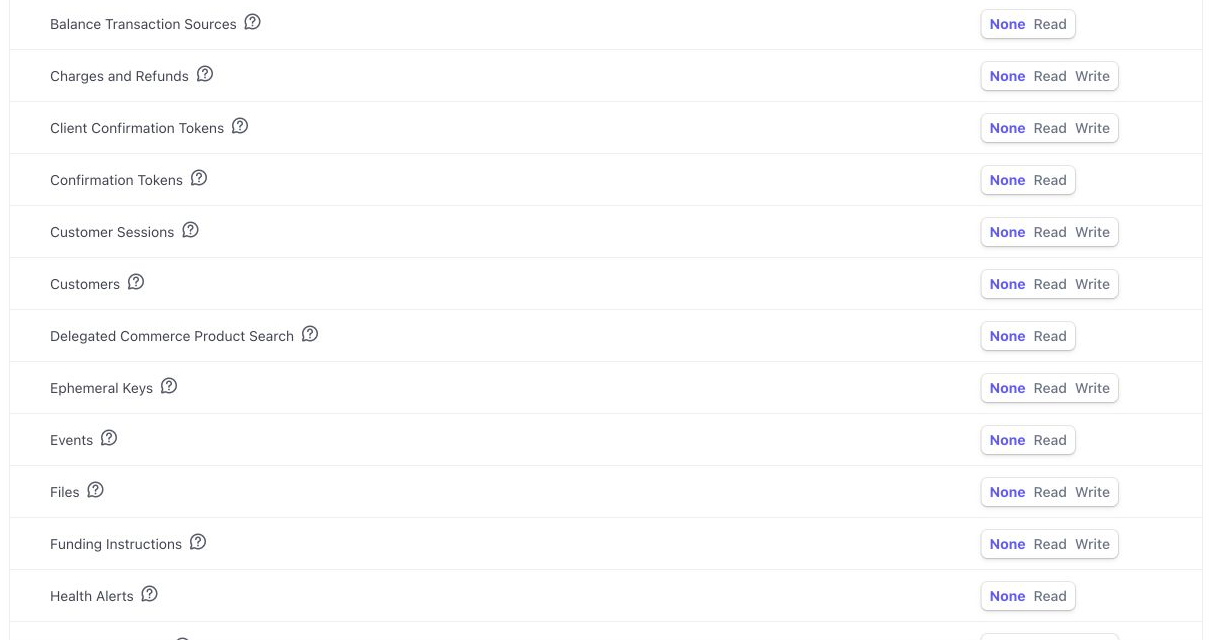
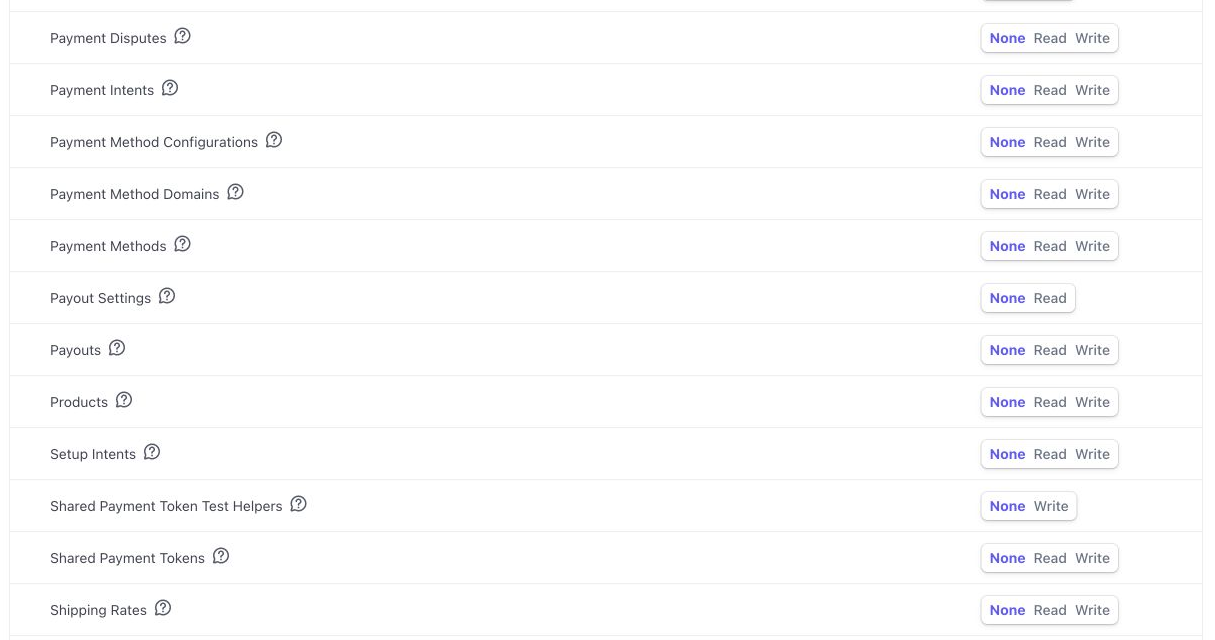
Set only the rows 9Pic needs, and leave unrelated resources on **None**.
| Stripe resource | Permission | Used for |
| ----------------------- | ---------- | ------------------------------------------------------------------------------------------------------------------------ |
| **Checkout Sessions** | Write | Opening Stripe Checkout for buyers and checking session status. |
| **Customers** | Write | Creating or updating buyer customer records for checkout and invoices. |
| **Payment Intents** | Write | Completing and checking card payments created through Checkout. |
| **Payment Methods** | Write | Supporting payment methods used by Stripe Checkout. |
| **Charges and Refunds** | Write | Stripe groups these together in the permission table. Choose Write so charge-related checkout workflows are not blocked. |
| **Balance** | Read | Reading balance-related Stripe information when needed for payment checks. |
| **Events** | Read | Reading Stripe event information for payment status checks. |
| **Files** | Read | Supporting Stripe-hosted payment or invoice file references when Stripe returns them. |
| **Invoices** | Write | Creating buyer invoices when invoice support is used. |
| **Invoice Items** | Write | Adding the purchased item line to the Stripe invoice. |
Stripe may rename or combine rows over time. For example, some accounts show **Charges and Refunds** as one row. If Stripe shows a permission-denied message later, edit the restricted key, add the missing resource permission, save, and test again.
## Required Stripe Permissions
Set only the rows 9Pic needs, and leave unrelated resources on **None**.
| Stripe resource | Permission | Used for |
| ----------------------- | ---------- | ------------------------------------------------------------------------------------------------------------------------ |
| **Checkout Sessions** | Write | Opening Stripe Checkout for buyers and checking session status. |
| **Customers** | Write | Creating or updating buyer customer records for checkout and invoices. |
| **Payment Intents** | Write | Completing and checking card payments created through Checkout. |
| **Payment Methods** | Write | Supporting payment methods used by Stripe Checkout. |
| **Charges and Refunds** | Write | Stripe groups these together in the permission table. Choose Write so charge-related checkout workflows are not blocked. |
| **Balance** | Read | Reading balance-related Stripe information when needed for payment checks. |
| **Events** | Read | Reading Stripe event information for payment status checks. |
| **Files** | Read | Supporting Stripe-hosted payment or invoice file references when Stripe returns them. |
| **Invoices** | Write | Creating buyer invoices when invoice support is used. |
| **Invoice Items** | Write | Adding the purchased item line to the Stripe invoice. |
Stripe may rename or combine rows over time. For example, some accounts show **Charges and Refunds** as one row. If Stripe shows a permission-denied message later, edit the restricted key, add the missing resource permission, save, and test again.
 ## Save the Key Safely
Confirm the key name, Stripe account, test/live mode, and permissions before you click **Create key**.
Click **Create key**. Stripe shows the restricted key value only once. Copy it immediately and store it securely.
Do not paste the key into email, chat, screenshots, task tickets, public documents, or browser-side code.
Do not create a live key until the Stripe account is ready for real payments. Test the setup with an `rk_test_` key first, then create a separate `rk_live_` key for production.
## Add the Key to 9Pic
In 9Pic, open **Payment Config** from the dashboard sidebar.
Click **Add Gateway**, choose **Stripe**, and paste the restricted key into the **Stripe Secret Key** field. The field stores the protected Stripe credential for your organisation, even when the key starts with `rk_test_` or `rk_live_`.
Click **Create Gateway**. The gateway list should show the Stripe configuration as **Configured**.
In **Event Mapping**, assign the Stripe gateway to each event that should use Stripe for 9Pic Checkout.
## Verify the Setup
Before using Stripe for a live event:
| Check | What to confirm |
| -------------------------------- | ----------------------------------------------------------------------------- |
| **Test payment opens** | A buyer can open Stripe Checkout from a test event. |
| **Payment completes** | A test payment returns to 9Pic and marks the order as paid. |
| **Invoice support works** | If buyers need invoices, generate one in test mode before launch. |
| **Blocked access stays blocked** | Unrelated Stripe resources should remain inaccessible to this restricted key. |
| **Logs look normal** | Review Stripe logs for permission errors after the test run. |
## Troubleshooting
Open the restricted key in Stripe, find the resource named in the error message, set the needed permission, save, and retry the test payment or invoice step.
Create a new restricted key, store it securely, add the new value to 9Pic, then revoke the unused key in Stripe.
No. Keep separate keys for test mode and live mode. This reduces mistakes and makes rotation easier.
Yes. Paste the restricted key value there. Stripe restricted keys start with `rk_test_` in test mode and `rk_live_` in live mode.
## Next Steps
Create and manage organisation-level gateway configurations.
Assign a gateway to an event, publish plans, and enable Checkout.
## Save the Key Safely
Confirm the key name, Stripe account, test/live mode, and permissions before you click **Create key**.
Click **Create key**. Stripe shows the restricted key value only once. Copy it immediately and store it securely.
Do not paste the key into email, chat, screenshots, task tickets, public documents, or browser-side code.
Do not create a live key until the Stripe account is ready for real payments. Test the setup with an `rk_test_` key first, then create a separate `rk_live_` key for production.
## Add the Key to 9Pic
In 9Pic, open **Payment Config** from the dashboard sidebar.
Click **Add Gateway**, choose **Stripe**, and paste the restricted key into the **Stripe Secret Key** field. The field stores the protected Stripe credential for your organisation, even when the key starts with `rk_test_` or `rk_live_`.
Click **Create Gateway**. The gateway list should show the Stripe configuration as **Configured**.
In **Event Mapping**, assign the Stripe gateway to each event that should use Stripe for 9Pic Checkout.
## Verify the Setup
Before using Stripe for a live event:
| Check | What to confirm |
| -------------------------------- | ----------------------------------------------------------------------------- |
| **Test payment opens** | A buyer can open Stripe Checkout from a test event. |
| **Payment completes** | A test payment returns to 9Pic and marks the order as paid. |
| **Invoice support works** | If buyers need invoices, generate one in test mode before launch. |
| **Blocked access stays blocked** | Unrelated Stripe resources should remain inaccessible to this restricted key. |
| **Logs look normal** | Review Stripe logs for permission errors after the test run. |
## Troubleshooting
Open the restricted key in Stripe, find the resource named in the error message, set the needed permission, save, and retry the test payment or invoice step.
Create a new restricted key, store it securely, add the new value to 9Pic, then revoke the unused key in Stripe.
No. Keep separate keys for test mode and live mode. This reduces mistakes and makes rotation easier.
Yes. Paste the restricted key value there. Stripe restricted keys start with `rk_test_` in test mode and `rk_live_` in live mode.
## Next Steps
Create and manage organisation-level gateway configurations.
Assign a gateway to an event, publish plans, and enable Checkout.