> ## Documentation Index
> Fetch the complete documentation index at: https://docs.9pic.ai/llms.txt
> Use this file to discover all available pages before exploring further.
# Create Your First Event
> The 90-second happy path from a fresh dashboard to processed photos on a live event link.
## Overview
This page is the **shortest possible path** from dashboard home to "my first event has photos". If you only have a minute, follow the steps below in order. Deeper references for every option live in the [Events](/dashboard-guide/events/list) section and the product reference sections later.
Expect about ten to twenty minutes total: the form itself takes under a minute, but syncing and processing photos depends on how many images you have.
## Before You Start
You need three things:
* An organiser account on 9Pic — see [Sign in](/dashboard-guide/getting-started/sign-in) if you haven't signed in yet.
* An event name, date, and city or venue.
* At least one source of photos: a folder of images you can upload, a 9pic Uplink, or a cloud folder link (Google Drive, S3, and similar). You can also add sources after the event is created.
## The 90-Second Happy Path
From dashboard home, click the **Create New Event** card in **Quick Access**. (You can also click **Events** in the sidebar and then the **Create** button in the top-right.)
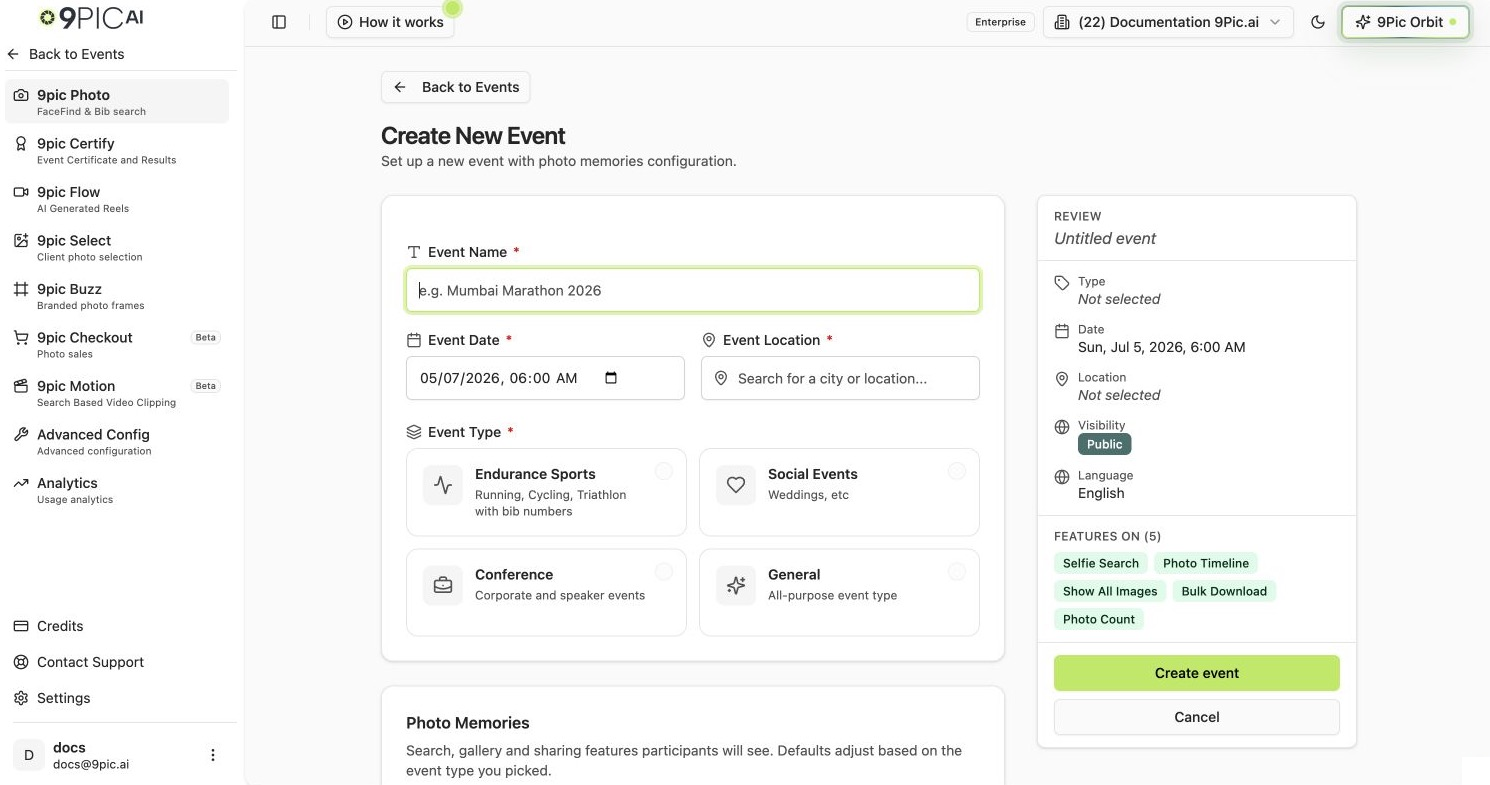
Enter an **Event Name** (you can use something like *First Event*), pick an **Event Date** and start time, and select your **Event Location** from the suggestions.
Choose **Endurance Sports**, **Social Events**, **Conference**, or **General**. Picking **Endurance Sports** unlocks bib number search.
For your first event, leave **Selfie Search**, **Show All Images**, **Bulk Download**, and **Show Photo Count** on (the defaults). You can change everything later from the event's Configuration tab.
The button is at the bottom of the form. You land back on the Events list with your new event highlighted.
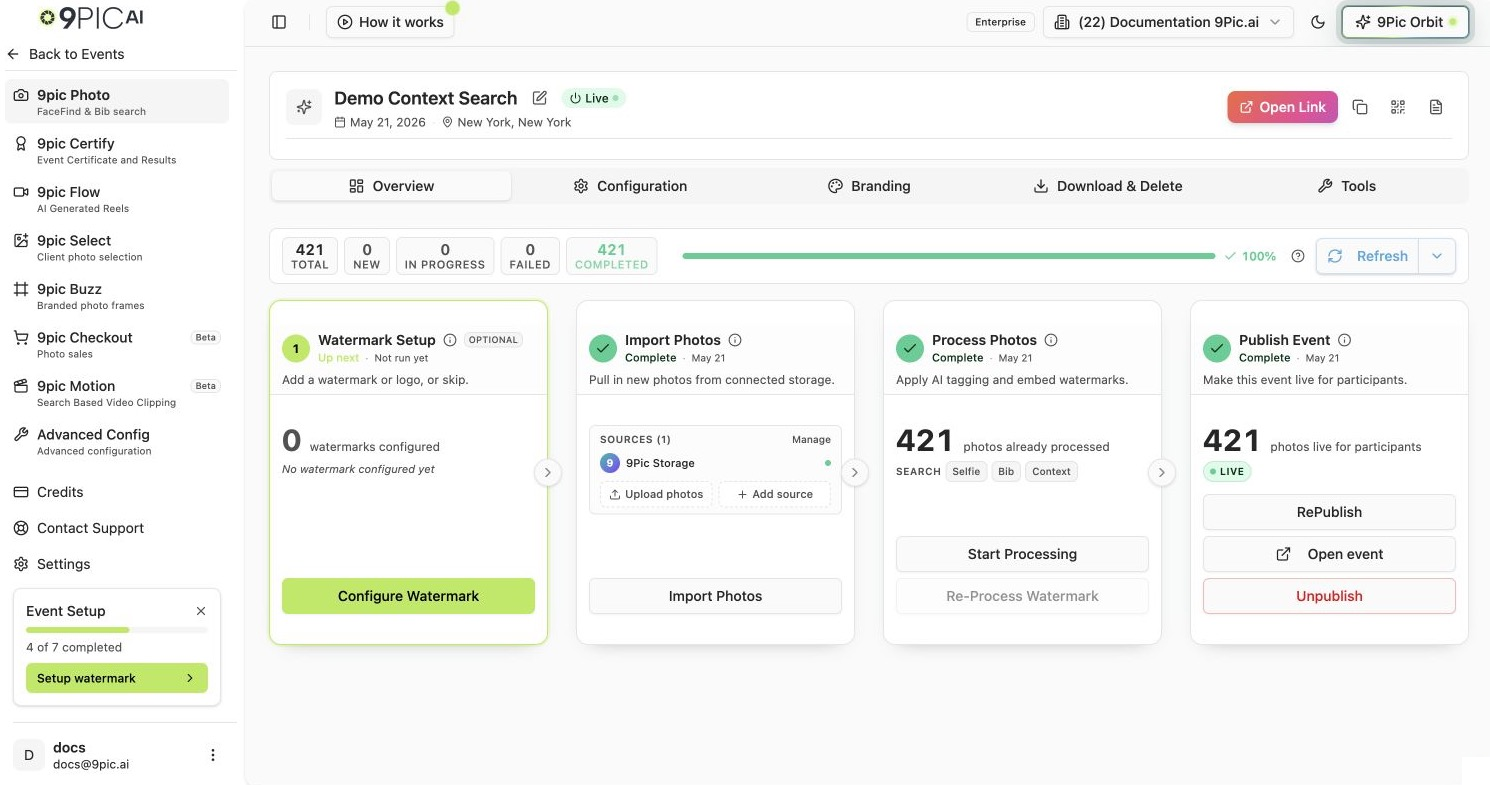
Click the row for your new event (or the **Configure** button on the right) to open event details. You land on the **9pic Photo** product, **Overview** tab.
From **Overview**, open **Manage Sources**. Either keep the default 9Pic Storage and upload images, or add a cloud folder link. Save.
Run **Sync Images** to pull photos from your sources, then **Start Processing**. Processing usually takes a few minutes per few thousand photos.
Once processing finishes, click **Go Live**. Use **Open Link** or **Copy Link** in the header to test the participant experience and share it.

 ## What You Just Did
| Step | Why it matters |
| ---------- | -------------------------------------------------------------------------------------------- |
| Event type | Drives which features are available (bib search only appears for Endurance Sports) |
| Sources | Tells 9Pic where to read photos from. You can add more sources at any time |
| Sync | Copies photos from your sources into 9Pic so they can be processed |
| Processing | Runs AI (face recognition, bib detection, optional watermarking) and makes photos searchable |
| Go Live | Publishes the event page so participants can search for their photos |
You can safely re-run **Sync Images** any time you add more photos to your source — it pulls only what's new and queues new images for processing.
## Choose Smart Defaults for Later
Once your first event works end-to-end, revisit these options for the next one:
* **Bib Number Search** — for races. Upload a name-to-bib CSV later to also enable name search.
* **Selfie Search** — face-recognition photo search. Defaults to on.
* **Show All Images** — lets participants see the full gallery, not only their matches.
* **Bulk Download** — lets participants download multiple photos at once.
* **Store Original Memories** *(Enterprise only)* — keep original files for watermark-free downloads. May incur extra storage charges.
For the full field-by-field reference, see [Create an event](/dashboard-guide/events/create).
**Store Original Memories** can increase your storage costs depending on your plan. Enable it only if you know your delivery model needs originals.
## If Something Goes Wrong
Open **Manage Sources** and confirm the source is **Live** and reachable. For cloud folders, double-check the share link is accessible.
Check your credit balance from the sidebar — processing pauses when an organisation runs out of credits. Top up from **Credits**, then re-run **Start Processing**.
Go Live becomes available only after processing has produced searchable photos. Wait for the processing status to reach *complete* (or *partial*) before clicking.
## Next Steps
Search, filter, and manage every event from one screen.
Field-by-field reference for every option in the new event form.
How the product navigation and tabs work inside an event.
Deeper coverage of sources, sync, processing, and watermarking once your first event is live.
Stuck for more than fifteen minutes? Email [support@9pic.ai](mailto:support@9pic.ai) with your organisation name and event ID and we will jump in.
## What You Just Did
| Step | Why it matters |
| ---------- | -------------------------------------------------------------------------------------------- |
| Event type | Drives which features are available (bib search only appears for Endurance Sports) |
| Sources | Tells 9Pic where to read photos from. You can add more sources at any time |
| Sync | Copies photos from your sources into 9Pic so they can be processed |
| Processing | Runs AI (face recognition, bib detection, optional watermarking) and makes photos searchable |
| Go Live | Publishes the event page so participants can search for their photos |
You can safely re-run **Sync Images** any time you add more photos to your source — it pulls only what's new and queues new images for processing.
## Choose Smart Defaults for Later
Once your first event works end-to-end, revisit these options for the next one:
* **Bib Number Search** — for races. Upload a name-to-bib CSV later to also enable name search.
* **Selfie Search** — face-recognition photo search. Defaults to on.
* **Show All Images** — lets participants see the full gallery, not only their matches.
* **Bulk Download** — lets participants download multiple photos at once.
* **Store Original Memories** *(Enterprise only)* — keep original files for watermark-free downloads. May incur extra storage charges.
For the full field-by-field reference, see [Create an event](/dashboard-guide/events/create).
**Store Original Memories** can increase your storage costs depending on your plan. Enable it only if you know your delivery model needs originals.
## If Something Goes Wrong
Open **Manage Sources** and confirm the source is **Live** and reachable. For cloud folders, double-check the share link is accessible.
Check your credit balance from the sidebar — processing pauses when an organisation runs out of credits. Top up from **Credits**, then re-run **Start Processing**.
Go Live becomes available only after processing has produced searchable photos. Wait for the processing status to reach *complete* (or *partial*) before clicking.
## Next Steps
Search, filter, and manage every event from one screen.
Field-by-field reference for every option in the new event form.
How the product navigation and tabs work inside an event.
Deeper coverage of sources, sync, processing, and watermarking once your first event is live.
Stuck for more than fifteen minutes? Email [support@9pic.ai](mailto:support@9pic.ai) with your organisation name and event ID and we will jump in.