> ## Documentation Index
> Fetch the complete documentation index at: https://docs.9pic.ai/llms.txt
> Use this file to discover all available pages before exploring further.
# Welcome to 9Pic
> Your journey from signing in to delivering your first event photos in minutes.
## What This Guide Is
The **Dashboard Guide** is your hands-on reference for running events on 9Pic. It walks new organisers from signing in to delivering their first set of processed photos, and then doubles as a deep reference for every screen, tab, and toggle in the dashboard.
If you have never signed in to 9Pic before, follow the four pages in **Start Here** in order. Each one builds on the previous one, so by the end you will have a live event with real photos.
 ## Your First-Day Journey
Open [admin.9pic.ai](https://admin.9pic.ai), sign in with Clerk, and pick the right organisation if you belong to more than one.
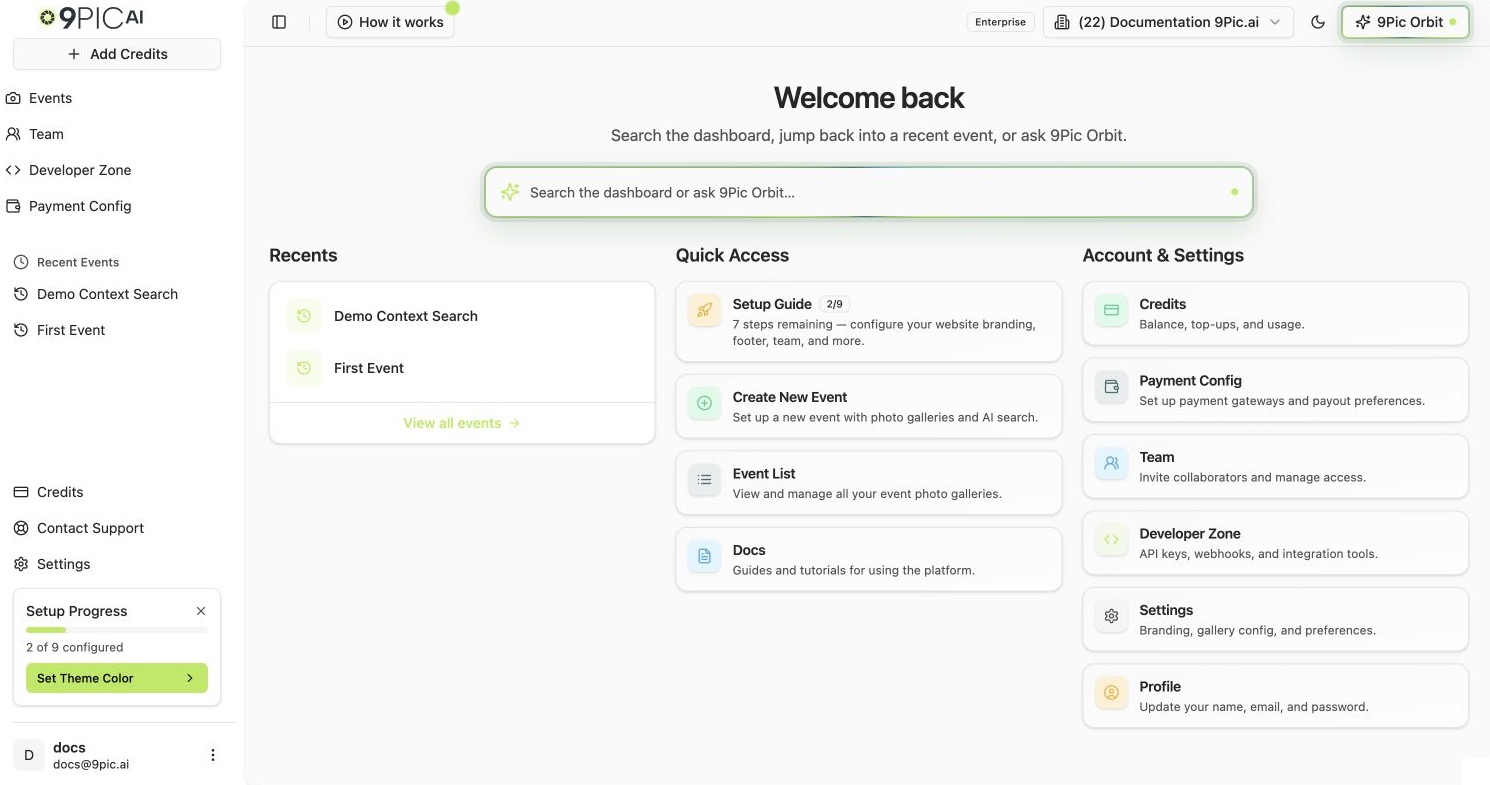
Spend two minutes on the dashboard tour — the sidebar, the Quick Access cards, the Setup Wizard widget, and the Account & Settings shortcuts.
Use the 90-second happy path: open **Create New Event**, fill in the basics, and land on the event details page.
From event details, connect a source, sync, process, and share the live link.
## Start Here — Read In Order
Sign in with Clerk, switch organisations, and confirm you landed in the right workspace.
Sidebar, Quick Access cards, Recent Events, and the Setup Wizard widget — what each one does.
The fastest path from a fresh dashboard to a live event link.
Once you have an event, learn how the Events list, create wizard, and details shell fit together.
## Deeper Reference
The rest of the Dashboard Guide mirrors the dashboard's product navigation. The event details page has **nine products** (Photo, Certify, Flow, Select, Buzz, Checkout, Motion, Advanced Config, and Analytics), each behind its own tab. The matching reference sections:
Sources, sync, processing, watermarks, branding, downloads, and AI tools for the core photo product.
Certify, Flow, Select, Buzz, and Motion — what each one does and how to enable it.
Checkout, payment configuration, and analytics for selling photos.
Branding, footer, contact, domain, and the rest of your public-facing site.
Need help at any step? Email [support@9pic.ai](mailto:support@9pic.ai) or open **Contact Support** from the dashboard sidebar.
## Your First-Day Journey
Open [admin.9pic.ai](https://admin.9pic.ai), sign in with Clerk, and pick the right organisation if you belong to more than one.
Spend two minutes on the dashboard tour — the sidebar, the Quick Access cards, the Setup Wizard widget, and the Account & Settings shortcuts.
Use the 90-second happy path: open **Create New Event**, fill in the basics, and land on the event details page.
From event details, connect a source, sync, process, and share the live link.
## Start Here — Read In Order
Sign in with Clerk, switch organisations, and confirm you landed in the right workspace.
Sidebar, Quick Access cards, Recent Events, and the Setup Wizard widget — what each one does.
The fastest path from a fresh dashboard to a live event link.
Once you have an event, learn how the Events list, create wizard, and details shell fit together.
## Deeper Reference
The rest of the Dashboard Guide mirrors the dashboard's product navigation. The event details page has **nine products** (Photo, Certify, Flow, Select, Buzz, Checkout, Motion, Advanced Config, and Analytics), each behind its own tab. The matching reference sections:
Sources, sync, processing, watermarks, branding, downloads, and AI tools for the core photo product.
Certify, Flow, Select, Buzz, and Motion — what each one does and how to enable it.
Checkout, payment configuration, and analytics for selling photos.
Branding, footer, contact, domain, and the rest of your public-facing site.
Need help at any step? Email [support@9pic.ai](mailto:support@9pic.ai) or open **Contact Support** from the dashboard sidebar.